Home → Intuit → Printer Friendly Version
Intuit
- 1. QuickBooks Desktop
- 1.1. QuickBooks Desktop Users and Restrictions
- 1.2. Create and open portable company files in QuickBooks Desktop
- 1.3. Create an Accountant's Copy of your company file in QuickBooks Desktop
- 1.4. Resolve QuickBooks Desktop performance issues: Manage your computers
- 1.5. Resolve QuickBooks Desktop performance issues: Manage your data file
- 1.6. Fix Error 80070057 (The parameter is incorrect)
- 1.7. Fix Error 3371: Could not initialize license properties
- 1.8. Reset your password for QuickBooks Desktop
- 2. QuickBooks Online
- 3. QuickBooks Time
1. QuickBooks Desktop
1.1. QuickBooks Desktop Users and Restrictions
This article serves as a guide on how to add, edit, and troubleshoot QuickBooks Desktop Pro and Premier User login and restrictions.
Set Up Users and Roles
|
For QuickBooks Desktop Enterprise users:
|
- Go to the Company menu, then select Set Up Users and Password and then Set up Users.
- Select Add User...
- Fill out the User Name, Password, and Confirm Password fields, then select Next.
- On the Access for user: (username) window, choose which area of QuickBooks the user has access to, then select Next.
- If you choose Selected areas of QuickBooks, you can customize the restrictions for different areas of the company file for the newly created user by selecting No Access, Full Access,or Selective Access.
- When done, select Finish.
Hide Account Balances from unauthorized users
The Home Page displays balances for accounts receivable, accounts payable, bank, and credit card accounts. To keep users from seeing the account balances, the user's access rights must be restricted.
- From the Company menu, select Set Up Users and Password and then Set Up Users.
- Highlight the user, then select Edit User...
- Choose Selected areas of Quickbooks option, then keep selecting Next until you are on the Sensitive Accounting Activities page.
- Select No Access.
- Keep selecting Next until you reach the end, then select Finish.
Resolve Unexpected Results
Error: "There is already a user with that name" when adding a new QuickBooks user
Solution 1: Update QuickBooks Desktop to the latest release
Solution 2: Create or restore a QuickBooks portable company file
Solution 3: Resolve data damage on your company file
User with full access cannot open Payroll Setup
Even if they have full access and are in single-user mode, secondary users that are not the Admin or External Accountant cannot open the Payroll Setup. If they try to open the Payroll Setup, they will get the error message:
Only the QuickBooks administrator or an External Accountant can perform this action. You must reopen the company file and login as the Admin or External Accountant to do this.
Restriction to the full payroll setup is as designed. Only the QuickBooks Administrator or an External Accountant can perform this action. If the secondary users have full access, they can still access the change payment method and change filing method portions of payroll setup from the payroll center.
Users without payroll permissions can see payroll information on reports and the calendar
To resolve this issue, you need to remove sensitive reporting.
- Sign in as the QuickBooks Admin.
- Go to the Company menu, then select Setup Users and Passwords and then Set Up Users.
- Highlight the user, then select Edit User.
- Follow the Change User Password and Access wizard to remove sensitive reporting access.
Note: If the user has access to sensitive accounting reports like Balance Sheet or Profit & Loss, they will still see the names and amounts on paychecks.
1.2. Create and open portable company files in QuickBooks Desktop
Step 1: Update QuickBooks
Before you start, update QuickBooks so you have the latest version.
Step 2: Consider creating a backup
Portable company files are great for sharing or moving accounting data around when you don't need a full backup.
A portable company file isn't a replacement for a full backup. It doesn't include your message templates, logos, images, or templates. It also doesn't include your .tlg or .log files, Loan Manager, Statement Writer, or Fixed Asset Manager files.
To completely back up your company files, follow the steps to create a backup company file.
If you want to send your data to your accountant, consider sending them an accountant copy.
Step 3: Create a portable company file
- Open QuickBooks and log in as an admin.
- Go to the File menu and select Create Copy.
- Select Portable company file and then Next.
- Give your portable company file a unique name. This makes it easy to tell apart from your regular company file.
- Select a location to save your portable company file. Pick somewhere that's easy to find, like your Windows desktop.
- When you're ready, select Save and then OK.
You now have a portable company file you can send online or put on a USB. The file will look like this: [Unique company file name].qbm.
Note: If you give someone a portable copy, they can access everything in the file. It's password protected and they'll need the password to open the file.
If you have issues creating a portable company file, here's how to fix it.
Step 4: Open a portable company file
To open a portable version of your company file:
- Open QuickBooks and log in as an admin.
- Go to the File menu and select Open or Restore Company.
- Select Restore a portable file, then select Next.
- Select your portable company file. It should look like this: [Unique company file name].qbm. Then select Open.
Important: Don't use the same name for your portable company file and regular company file. If you save them in the same folder, the portable file will overwrite the regular one. Either can either rename the portable company file, or save it to a different folder.
- Read the notes on the Where do you want to restore the file page, then select Next.
- When you're ready to open your file, select Save.
When you open your portable company file, QuickBooks automatically reindexes your data. This fixes many data issues.
If you have issues creating a portable company file, here's how to fix it.
1.3. Create an Accountant's Copy of your company file in QuickBooks Desktop
Step 1: Set up QuickBooks
Before you start, if you use QuickBooks Desktop Enterprise, turn off any Advanced Inventory features you currently use. You'll turn them back on as soon as you send the Accountant's Copy.
You can skip this step if you use QuickBooks Desktop Pro or Premier, or don't use Advanced Inventory.
Step 2: Create an Accountant's Copy
There are two ways to get an Accountant's Copy to your accountant. You can create a file to put on a USB or online hosting service. Or you can use the Accountant's Copy File Transfer Service to send a file through the web.
Create a file you can put on a USB
- Go to the File menu and hover over Send Company File.
- Hover over Accountant's Copy and then hover over Client Activities.
- Select Save File and then Next.
- Select Accountant's Copy and then Next.
- Enter the dividing date. Then select Next.
You now have an Accountant's Copy. It has a .qbx extension at the end of the filename. You can put the file on a USB and give it your accountant, attach it to an email, or share it through a cloud service like Box.
Send a file through the Accountant's Copy File Service
- Go to the File menu and hover over Send Company File.
- Hover over Accountant's Copy and hover over Client Activities.
- Select Send to Accountant and then Next.
- Select Accountant's Copy and then Next.
- Enter the dividing date. Then select Next.
- Enter your and your accountant's email addresses.
- Create a file password for the file. Your accountant needs this to open it.
- When you're ready, select Send.
QuickBooks closes all open windows and sends the file. Keep in mind, your accountant has two weeks to download the Accountant's Copy you sent.
For accountants: download the accountant's copy to make changes
- You'll receive an email from Intuit containing a link to download your client's company file.
- Access the download link and you'll receive another email with the one-time password your client provided during the upload.
- Enter this password to download the accountant's copy.
- Open the file in QuickBooks to make the necessary changes.
Turn Advanced Inventory back on
Next steps: Import your accountant's changes
After you send the Accountant's Copy, QuickBooks adds an "Accountant's Changes Pending" reminder next to your company file name. It also restricts certain activities to avoid conflicting with your accountant's changes.
The message stays until you get the file back and import your accountant's changes, or until you remove the Accountant's Copy restriction.
1.4. Resolve QuickBooks Desktop performance issues: Manage your computers
Optimize your server and workstations to minimize performance issues in QuickBooks Desktop.
|
This is Part 1 of a series that covers performance issues in QuickBooks Desktop and how to resolve them. If the steps here don't resolve your issues, try the steps in the other
|
Enhance your computers
QuickBooks system requirements will support most QuickBooks users. If your computer system meets these specs and still experience performance issues, you may want to increase your available RAM. Remember your goal is to increase the amount of RAM available to QuickBooks.
To know the amount of RAM you need for QuickBooks, multiply the size of your file in GB, by the number of users in the network. So, if your file size is 500 MB (0.5 GB) and you have 6 users, then you need 3 GB of RAM in your server. If you have only 2 GB and you experience performance issues, you may want to upgrade your server to 3 GB of RAM.
Virtual Memory
- Increase a computer's Virtual Memory (VM) to 2 GB plus 2 GB for each major application you run on the computer.
- Be sure VM is runs on an internal hard drive.
- If your server has multiple internal drives, store the data file on one drive and the VM on another drive.
Competing Programs
A competing program is one that runs at the same time as QuickBooks. Each program requires RAM and processor capacity. You can see your programs in the Task Manager. Check out the Processes Tab.
- Shutdown programs and processes not in use on your computer. This enables the operating system to assign more RAM to QuickBooks.
- If you can't shut down a program, move either QuickBooks or the other program to another computer. A common example is the Exchange program that runs your e-mail system.
- In some systems, there are too many programs that run on the Domain Server for QuickBooks to run efficiently. You might want to move QuickBooks to another server.
RAM Improvements
- Add memory chips. If your server has four sockets, and 2 sockets have 1 GB DRAM chips, install two 1 GB DRAM chips in the empty sockets.
- Upgrade your memory chips, e.g., replace 1 GB DRAM chips with 2 GB DRAM chips.
- Increase workstation RAM.
- Be aware of your operating system's limits on the amount of RAM it supports.
Upgrade your operating system
If you upgrade the RAM on your workstations and server and it doesn't resolve the issue, you might want to upgrade your operating system. Older operating systems have lower limits on the amount of RAM they can support.
Upgrade Computers
If you decide to upgrade your server and/or workstations, please consider the following:
- Make sure that the computer that will store the file is a true server ( not a service like Dropbox ).
- Fill all of the RAM slots with the highest capacity chips.
- A 64-bit computer & operating system.
- A fast clock speed of 2.2 GHz or more.
- A fast hard drive rotational speed, e.g., 7,500 or 10,000 rpm, or a solid state drive.
- A fast Network Interface. A 1 Gigabit per second (Gbps) card on your server can increase bandwidth.
Terminal Server
If you run QuickBooks in a terminal server environment, you can estimate the amount of RAM on the server in two ways. The first is you need 0.5 GB of addressable RAM for each user. If you have five users, you need 2.5 GB of RAM. The second way is:
- For 5 users, you need 2-3 GB addressable RAM
- For 10 users, you need 3-4 GB addressable RAM
- For 15 users, you need 4-6 GB addressable RAM
- For 20 users, you need 6-8 GB addressable RAM
Note: Intuit supports Terminal Services mode only for QuickBooks Enterprise.
Where to store your data file
- Where you store your company data file can have a noticeable effect on the performance of QuickBooks.
- You can set up a folder in your C: root directory to store your data file and ancillary files: C:\QBData\filename.qbw.
- Remember to move the entire data folder when you need to move the data file.
Use a computer on a network
- Store your company data file on an internal hard drive on a computer on your network.
- Use an external hard drives or a flash drive only to back up your data file.
- We don't recommend a Network Attached Storage (NAS) drive. We design QuickBooks for Windows to store files on a computer with a Windows Operating System, or with a Windows compatible SAMBA share (Enterprise only).
- QuickBooks works with a server running a RAID (Redundant Array of Inexpensive Disks). We don't recommend them because they've been known to cause performance issues.
Non-Dedicated Server/Host
If you don't have a dedicated host or server, use this info to help decide which workstation to use to save your file. Save your data file on the workstation that:
- Has the full QuickBooks program on it.
- Store on the computer you use most. This will minimize data transfer over the network.
- Has the most RAM.
- Has the fastest clock speed.
- Has the least non-QuickBooks activity.
Your Data Folder
When you create or move files, QuickBooks uses these default locations:
Windows 7, 8, 10: C:\Users\Public\Public Documents\Intuit\QuickBooks\Company Files
Optimize your network interface card (NIC) settings
View and Edit your NIC settings
Network interface card (NIC) settings can slow the transfer rate if you have duplex mismatches. A duplex mismatch happens when one NIC is set to a specific link speed and duplex and connects to a NIC set to a different value. A mismatch can reduce your bandwidth to a few Megabits per second (Mb/s). To avoid this, reset all of your NIC's Link Speed and Duplex to an automatic setting.
- Select the Microsoft Windows Start button, select Control Panel. (In older Windows versions, you need to select Settings before you select Control Panel.)
- Double-click System and select the Hardware tab.
- Select Device Manager.
- Select the + next to Network adapters to expand the list.
- Right-click the NIC and select Properties.
- Select the Advanced tab.
- Under Property, select the Link Speed & Duplex option (the option may be named something else similar).
- Seelct the Value drop-down arrow and select Auto (the option on your NIC could be named something else).
- Select OK and close the window.
1.5. Resolve QuickBooks Desktop performance issues: Manage your data file
If you have issues with the performance of your QuickBooks Desktop, your company file may be the root cause. You have options to resolve such issues.
QuickBooks' performance decreases as the size of the company file increases. There are no actual limits on the size of your company data file. Performance issues can happen if your network can't hande large data files.
|
This is Part 2 of a series that covers performance issues in QuickBooks Desktop and how to resolve them. If these steps don't resolve your issues, try the steps in the other articles:
|
Before you continue, make sure the QuickBooks installations and the Database Server Manager on the host or server, are up to date. To update QuickBooks, check out Update QuickBooks Desktop to the latest release. To update the QuickBooks Database Server Manager, see Install, Update, and Set up the QuickBooks Database Server Manager.
Recommendations to resolve performance issues
Set company and personal preferences
Automatic pop-ups appear in QuickBooks and sometimes cause a slow response. To avoid this, you can turn off auto pop-ups in QuickBooks preferences. Here’s how.
Note: If you’re in Multi-user, make sure to switch to Single-user mode.
Company and Personal Preferences
As you change preference areas, save any modifications you’ve made before going to the next preference. Select Yes when you're prompt to save your preference changes.
Bills preferences
Items and inventory preferences
Sales and Customers
Search
Desktop view
Reminders
Reports and Graphs
Automatic updates
Reduce the size of the company file
If you have a large file and performance is slow, you can reduce the size of your company file. All of these options are complex and require a lot of time and work. You can:
-
- Run the Condense Data Utility. See: The Condense Data utility for instructions.
- Truncate your company file. This capability is not built into QuickBooks, and we don't offer truncation as a service. You can remove transactions up to certain dates and then set up opening balances as of that date. You can send your company file to a third party vendor to truncate your data. Fees may apply. For US only, if you truncate your file in a previous calendar year, it shouldn't affect DIY with DD payroll. If you have Assisted Payroll, consult Payroll Support before you truncate your file.
- Start a new company file.
- US only: When you start a new company file, it won't affect Desktop Payroll DIY with Direct Deposit. If you have Assisted Payroll, consult Payroll Support before you start a new file.
- If you decide to start a new company file, you have two options:
- Use the Condense Company Data option to delete all transactions. This leaves you with a shell that has only your lists. (applies to US only)
- Create a new file from scratch. This sounds simple, but can be a lot of work and will take time.
- In the old file, go to File, then select New Company. Follow the wizard that appears.
- In the old file, export your lists. Open the files and clean them up. Delete any inactive list or list entries you don't need. See Export or import IIF files for steps to export your lists.
- Import your clean files into the new file. See IIF Overview: import kit, sample files and headers.
- Set up the opening balances. Go to the QuickBooks App Store to find utilities that will do this for you. Fees may apply.
Optimize QuickBooks operations
- Reduce your DB File Fragments. Excessive DB File Fragments can degrade the performance of your computer. See Database (DB) file fragments for more info.
- Resort your Primary Name List (customers, vendors, employees, and other names), your Chart of Accounts and your Item List. Do this to your lists weekly. Use steps from: Re-sort lists in QuickBooks Desktop.
- Verify your company file weekly. See Resolve data damage on your company file.
- Transaction log files (TLG ) keep track of changes to the file since the last backup. Large TLG files can cause performance issues. Don't delete the TLG file. Instead, make a manual backup with full verification to reset the TLG.
- Since QuickBooks Desktop re-indexes the data when it restores a portable company file, create and restore a portable company file. See Create or restore a QuickBooks portable company file for details.
- Don't enter zero lines on transactions. A zero line (with a zero price or quantity) adds another target to your data file and increases the size of your data file. Zero lines slow QuickBooks' performance and, if you run cash basis reports with inventory, your COGS could be wrong.
- Run accrual reports instead of cash: Many transactions, i.e. more than 50,000, tend to degrade the Sybase Sequel server. Cash basis reports take longer to run because QuickBooks must check transactions' links to determine what is paid and unpaid.
- If QuickBooks runs slowly when doing payroll, have other users log off and perform payroll tasks in single-user mode.
- Close QuickBooks windows that aren't in use.
- Clear the queues of forms you want to print or email.
- If you're the only user in the data file, switch to single-user mode.
- Reboot your workstations daily.
- Sign out of the data file when it's not in use and don't stay signed in to the company file overnight
- Perform long tasks in off-peak hours (e-mail or print batches of invoices or statements) in the off-hours (before normal hours, lunch time or overnight)so they don't take resources from other users.
- Optimize reports. When you run reports, it draws together a lot of data. If you optimize reports and print reports, it can save a lot of time and resources. The Sales Tax Liability Report and the General Ledger report tend to be long reports. Here are some tips:
- Run long reports in the off-hours, during lunch, overnight, over the weekend.
- Customize and memorize long reports.
- Copy your company file to an unused workstation, set the driver to print directly to the printer and print your report.
- Turn off the built in search indexing in QuickBooks Desktop (Edit > Preferences > Search > Company Preferences > (Uncheck) Update Automatically) and rename the <Filename>.qbw.SearchIndex folder.
IMPORTANT:- Quickbooks auto creates <Filename>.qbw.SearchIndex when QuickBooks Desktop search preference is set to automatic. The program uses the contents of this folder to run a quick index search when you press F3 in a company file.
- You can still search in your company file when you turn off the built in search index, but it will take longer. If your performance didn't improve when this is switch to off, we recommend you turn it back ON.
- You can find the .qbw.SearchIndex folder in the same location as your company file.
Example: C:\Users\Public\PublicDocuments\Intuit\QuickBooks\CompanyFIles\CompanyFileName.qbw.SearchIndex
Maintain lists
|
Before you start:
|
List characteristics that can hinder performance
- Your lists are approaching the list limits. Learn more about the maximum number of list entries (list limits and custom fields).
- Your lists have a large number of inactive entries you don't use.
- Your customer list has many jobs underneath customers.
- Your account list has many sub-accounts.
- Your item list has many sub-items.
- The Customer, Vendor, and Employee centers have custom-sorted name lists.
Custom Sorted Lists
- Open the Center (Customer Center, Vendor Center, etc.) that has performance issues.
- To the left of the Name column, ensure there is no diamond column.
- If there is a diamond column, click the diamond to remove it. You don't need to be in single-user mode to remove the diamond.
- Close the Center and reopen it.
Modify Lists
Chart of Accounts: If you use sub-accounts to track source of income or use of expenses, merge sub-accounts together or into the parent accounts and set up Classes to do tracking.
Item List: Merge together old and/or inactive items you don't sell. When you merge these items, they lose their identity. Be sure you have an archive copy with the history of each item.
Customer List: If your Customer:Job list have old jobs underneath Customers, merge them together. If you have old, inactive Customers merge them together. The merged customers and jobs lose their identity. Be sure you have an archive copy with the history of each customer.
Vendor List: If you have old, inactive Vendors, merge them together. The merged vendors lose their identity. Be sure you have an archive copy with the history of each vendor.
Employee List: If you have old, inactive Employees you no longer employ, merge them together. The merged employees lose their identity. Be sure you have an archive copy with the history of each employee. This includes all of their tax forms up to date, printed and submitted to the appropriate tax agencies.
1.6. Fix Error 80070057 (The parameter is incorrect)
Learn what to do if you see Error 80070057 when trying to open your company file in QuickBooks Desktop.
If you see Error 80070057 (The parameter is incorrect) when trying to open your company file, we’re here to help. Follow these steps so you can get back to working on QuickBooks.
Solution 1: Open your company file correctly
You may avoid getting an error if you’re opening the company file correctly.
- Open QuickBooks Desktop.
- Select the company file.
- Select Open.
Note: If your file is located on a remote computer, learn how to access it correctly.
Solution 2: Update QuickBooks to the latest release
Make sure your QuickBooks is up-to-date so it would have the latest features and fixes.
Solution 3: Run QuickBooks with admin permissions
Make sure QuickBooks has sufficient permissions so it can run without any problems.
- Close QuickBooks Desktop.
- Right-click the QuickBooks icon.
- Select Run as administrator.
- If your company file did not open automatically, select the company file, then select Open.
Note: If you get the error while installing QuickBooks Desktop, try re-downloading the program from the website.
Solution 4: Move your company file to default location
If your company file is saved in a different location, move it to its default location.
- Close QuickBooks Desktop.
- Browse to the location of your company file.
- Right-click the company file (.QBW), then select Copy.
- Browse to the default location, right-click and select Paste.
Location: C:/Users/Public/PublicDocuments/Intuit/QuickBooks/Company Files - Open QuickBooks, then select Find a company file.
- Select Local Drives, then search the company file name.
- Select the correct company file, then Open.
Note: If you’re on a multi-user, make sure to share your files after you moved it.
Solution 5: Run the QuickBooks File Doctor
The QuickBooks File Doctor helps fix common errors when working on your company file. To use File Doctor, download and install the QuickBooks Tool Hub.
Solution 6: Manually Resolve Error 800070057
Step 1: Rename the .ND file
- Browse to the location of your company file.
- Look for the corresponding .ND file of your company file.
Example: MyCompanyFileName.qbw.nd - Right-click the .ND file, then select Rename.
- Type in .old at the end of the file name.
Example: MyCompanyFileName.qbw.nd.old
Note: You may proceed to the next step if you’re using QuickBooks in Multi-user mode.
Step2: Run the QuickBooks Database Server Manager on your server
- If you haven’t yet, download and install the QuickBooks Tool Hub.
- In the tool hub, select Network Issues.
- Select QuickBooks Database Server Manager. If QuickBooks isn’t installed on your server, you’ll be prompted to install it.
- Inside the QuickBooks Database Server Manager, select Start Scan if your company file folder(s) are displayed. If they aren’t, Browse to the location of your company file and then select Start Scan.
- Select Close.
| Note: If you’re using BitDefender, make sure it excludes QuickBooks folder from scanning. |
1.7. Fix Error 3371: Could not initialize license properties
Learn what to do if you see Error 3371: Could not initialize license properties.
Sometimes, when you activate or open QuickBooks Desktop, you might see one of these error messages:
- Could not initialize license properties. Error 3371: QuickBooks could not load the license data. This may be caused by missing or damaged files.
- Could not initialize license properties. [Error 3371, Status Code -11118] QuickBooks could not load the license data. This may be caused by missing or damaged files.
- Could not initialize license properties. [Error: 3371, Status Code -1] QuickBooks could not load the license data. This may be caused by missing or damaged files.
Note: If you use WebConnect with QuickBooks Enterprise on Right Networks, you’ll see this error if you open the file before you save it. You must first save the file before you import the .QBO file.
Solution 1: Run the 3371 Error Fix from the QuickBooks Tool Hub.
Step 1: Download and install the QuickBooks Tool Hub
The QuickBooks Tool Hub helps fix common errors. You'll need to close QuickBooks to use the tool hub. For the best experience, we recommend you use Tool Hub on Windows 10, 64-bit.
- Close QuickBooks.
- Download the most recent version (1.6.0.3) of the QuickBooks Tool Hub. Save the file somewhere you can easily find it (like your Downloads folder or your Windows desktop). Note: If you've installed Tool Hub before, you can find out which version you have. Select the Home tab. The version will be on the bottom.
- Open the file you downloaded (QuickBooksToolHub.exe).
- Follow the on-screen steps to install and agree to the terms and conditions.
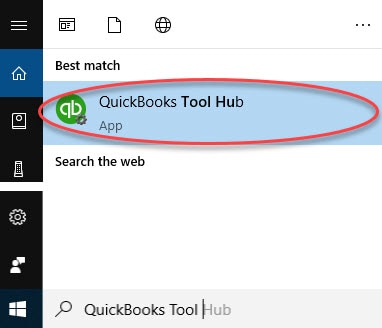
- When the install finishes, double-click the icon on your Windows desktop to open the tool hub.

Note: If you can't find the icon, do a search in Windows for QuickBooks Tool Hub and select the program.
Step 2: From the Tool Hub, run the 3371 Error Fix
- In the QuickBooks Tool Hub, select Installation Issues.
- Select 3371 Error Fix.
- Select OK.
- Start QuickBooks Desktop and open your data file.
Solution 2: Reinstall QuickBooks Desktop
Reinstall QuickBooks Desktop. If you still see the error after you reinstall, you’ll need to work with a qualified IT professional or contact Microsoft. There may be damage to your Windows Operating System.
1.8. Reset your password for QuickBooks Desktop
If you don’t have your password, don’t worry. Here’s how to get back into your company file. If you’re on a Mac, follow these steps instead.
| Just need to answer password reset questions? Check out your Customer Account Management Portal (CAMPS). All the info you need is on the landing page once you sign in. |
Step 1: Determine the type of password you need to reset
You can reset your Admin password or a user password.
Admin password
You need to reset the admin password if:
- You don’t have to enter a user name. When you sign in, you only enter a password.
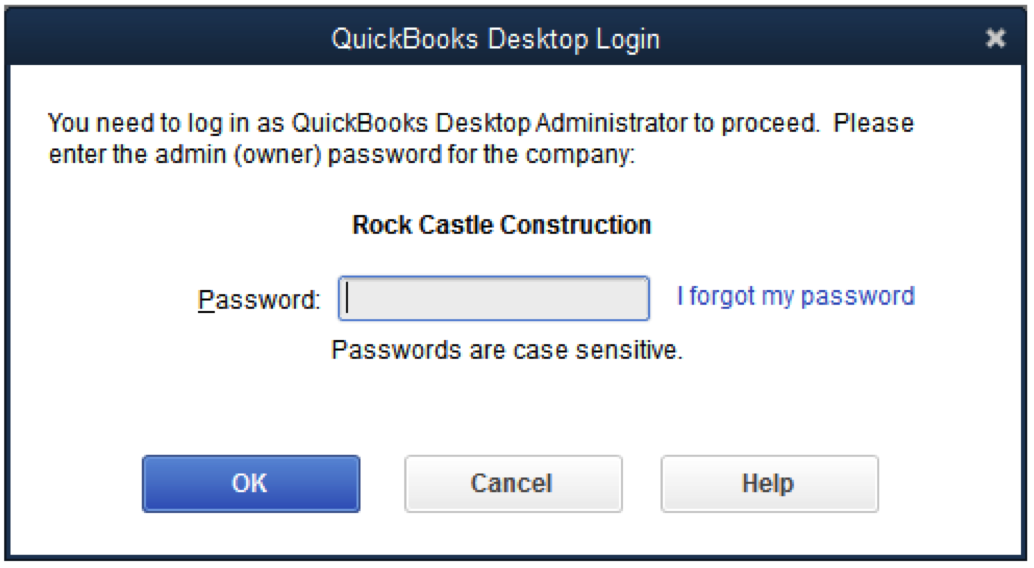
- Your User Name is “Admin” or you have another user with the admin role.
User password
If you’re not an admin user, your QuickBooks admin can reset your password for you. Contact your admin and have them follow the steps in the "Reset a user password" section below.
Step 2: Follow steps for your password type
Once you know what type of password you need to reset, follow the steps.
Note: If you’re upgrading to QuickBooks Desktop 2020, make sure to reset your password in your earlier version of QuickBooks first.
Reset the admin password
To watch more how-to videos, visit our video section.
If you know your admin password and want to change it, learn how to change your user password in the "Reset a user password" section.
If you need to reset your admin password because you don't remember it, you'll need to confirm some info as a security step. If you don’t remember the info, we’ll show you how to find it.
For QuickBooks 2020:
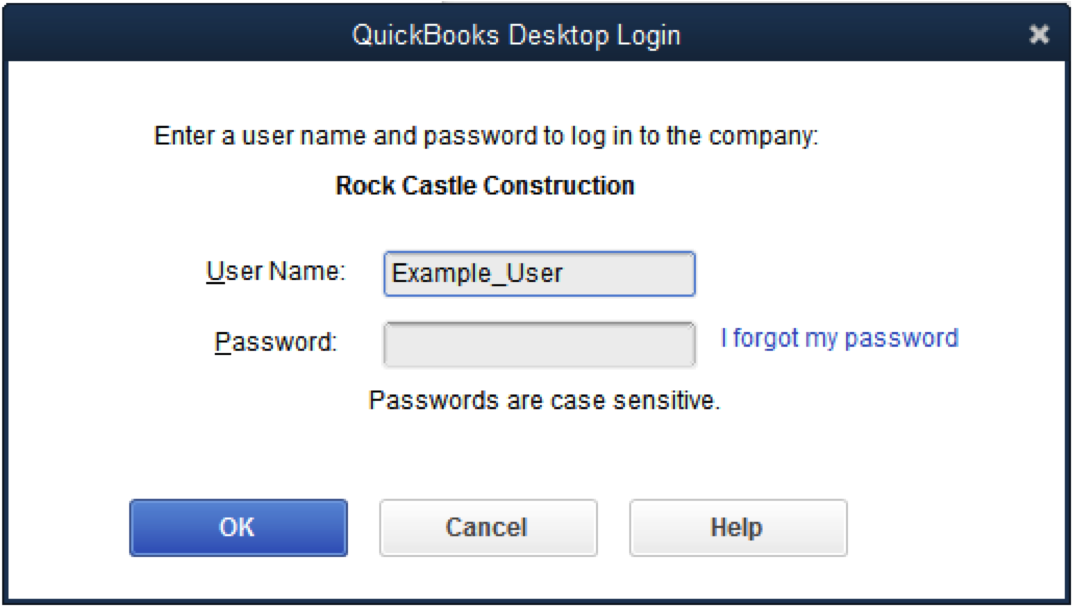
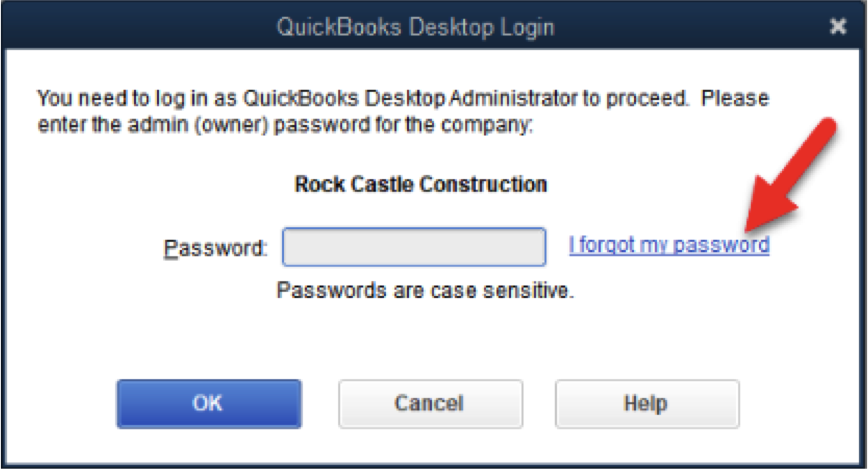
- On the Company Login window, select I forgot my password.
- Select an email from the dropdown list, then Next. We'll email a token to reset your password. Note: If you don’t see your email address, select Don’t see your email in the list above? and follow the onscreen instructions.
- Enter the token from your email.
Emails from us can show up in your spam folders. Check your spam and junk folders if you don't see your code in your inbox.
For QuickBooks 2019 and earlier:
- Open QuickBooks Desktop. From the login window, select I forgot my password.
- Fill out the info on the form.
- Your license number for QuickBooks Desktop. (Hold down F2 on your keyboard from the login window to see your license number).
- enter the name, email address, phone number, and ZIP code you used when you purchased the product.
Note: You can find all this info when you sign in to your Customer Account Management Portal (CAMPS). If you have trouble with the sign in, you can reset your CAMPS password.
- Select OK. If your info is correct, you’ll get a code to the primary email in your CAMPS. Emails from us can show up in your spam folders. Check your spam and junk folders if you don't see your code in your inbox.
- QuickBooks will then guide you through creating a new admin password.
If the password reset doesn't work
- Double-check your info. Check for any typos and confirm the info matches with what's in CAMPS.
- If you got an error or still need help with your password, try the Automated Password Reset tool.
- If you still need help, select Search for something else, type password, and select Search to contact us.
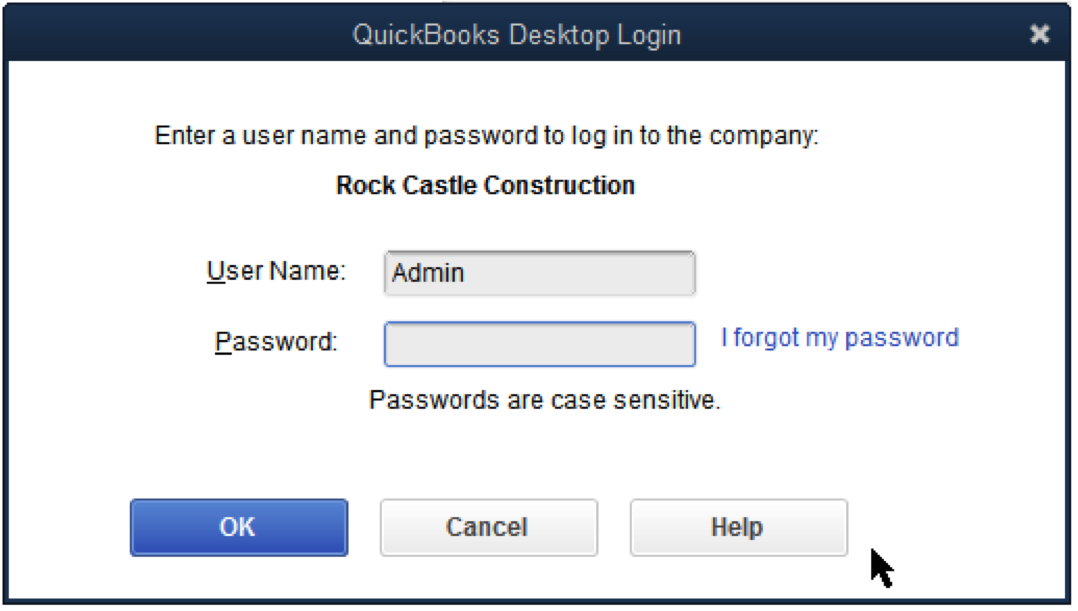
Reset a user password
- Sign in as the admin user.
- Go to Company, select Set Up Users and Passwords. Then select Set Up Users.
- If prompted, enter the admin password again.
- In the User List, select the user that needs to change their password. Then select Edit User.
- Enter a new password.
- Select Next twice, then select Finish.
2. QuickBooks Online
2.1. Setup Autopay for Recurring Invoice
Autopay can only be set up for the full amount. If your customer edits the amount, then the Autopay option no longer displays.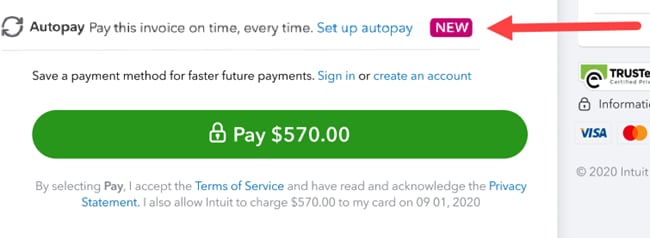
Your customer needs their Intuit account to use autopay. If they don't have an Intuit account, they'll need to create a new login.
- To setup Autopay, your customer opens your invoice and selects Set up autopay to enroll.
- Next, your customer will need to sign in using Intuit user ID (also used for TurboTax and Mint).
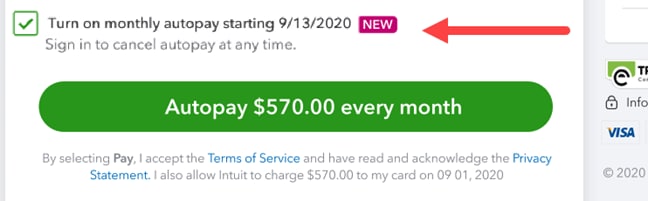
- Your customer makes sure the autopay checkbox shows as selected and displays the correct frequency and start date.
- Once everything looks good, your customer selects the Autopay button to pay the current invoice. They’ll receive a confirmation email that Autopay is set up.