Note: This article applies only to Microsoft 365 operated by 21Vianet in China.
Set up email in the Outlook for Android app


If you haven't already, download the Outlook app from your Local Android app store in China.
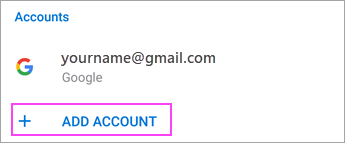
Or, go to Settings > Add Account > Add Email Account.
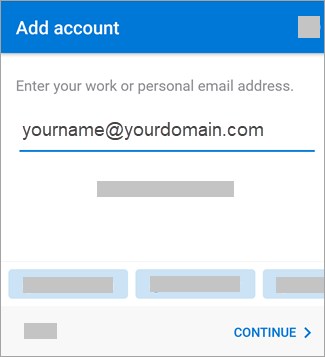
Note: If you're prompted for server setting information, you may have to set up manually or use IMAP or POP. See the server settings help section below for details.
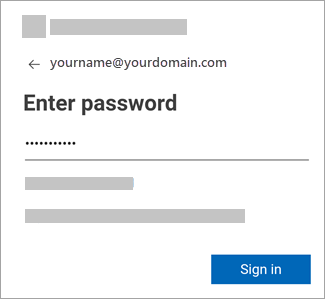
Note: The sign in screen may look different for you depending on your email provider.

You're now ready to use Outlook for Android!

Set up email in the built-in Android apps
The appearance of Androids can vary so use these steps as a guide or consult the manufacturer's help for your particular device. If you're setting up in the built-in app, see the Android built-in app section below.
-
Open the Google Play Store app on your phone.
-
Type "Gmail" into the search bar and then select Update.
Note: If the update option is not available, you're already on the latest version.
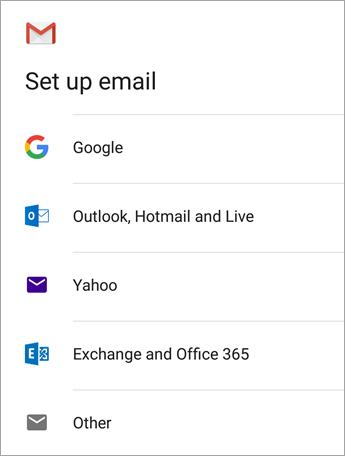
After the update is installed, tap the Gmail app icon to open it.
Important: Do NOT choose "Outlook, Hotmail, and Live" unless you want to sync email only.
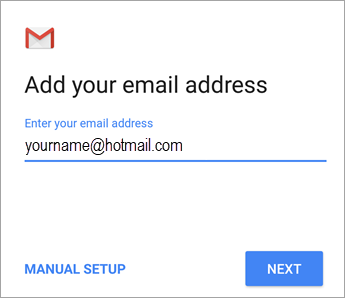
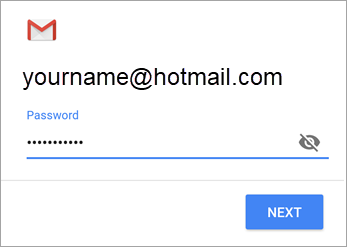
Enter your password and tap Next.
Note: If you're prompted for server setting information, you may have to set up manually or use IMAP or POP. See the server settings help section below for details.
If you use Microsoft 365 for business, you may also be asked to give additional security control. In this case, choose Activate.
If you don't see this message and your emails are syncing, skip this step.

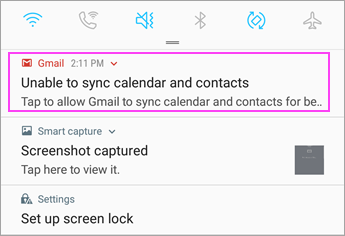
If you see a notification that reads "Unable to sync calendar and contacts," tap it. Then tap Allow to give access and you're done!
Note: If you don't see a sync error notification, you're good to go!