Home → Microsoft → Windows → How to Fix the WinX Menu Not Working on Windows
1.24. How to Fix the WinX Menu Not Working on Windows

The WinX menu (also known as the Power User menu) lets you access essential Windows functions quickly. These functions include the Device Manager, Network Connections, and Power Options, to name a few. But what if this menu suddenly stops working?
If you're in this boat, we've explained a few fixes to get your Power User menu working again.
What Causes the WinX Menu to Stop Working?
- Corrupted System Files: This is one of the most frequent causes. Windows relies on system files to operate correctly. If these files are missing or corrupted, you'll experience issues like this.
- Conflict with Third-party Software: If you have recently installed new software on your system, it might cause conflicts with the Win + X menu functionality.
- Faulty Keyboard: A faulty keyboard could also be the culprit. If the Win or X keys are not working, you won't be able to access the power user menu.
Now that you know the possible causes, it's time to get your Win + X menu working again. Let's start with the first fix!
1. Restart Your PC
If you're facing trouble with the Power User menu, try restarting your Windows computer. A restart refreshes your system and repairs software glitches that prevent the WinX menu from working correctly.
Once your PC has restarted, check if your Power User menu works fine.
2. Check the Win and X Keys on Your Keyboard
Sometimes the problem with key combination errors lies withing your keyboard. To ensure the Win and X keys aren't defective, open any text editor like Notepad and try pressing the keys individually.
If any of these keys aren't responding, try giving your keyboard a clean. Use a soft cloth to gently wipe the key and check if it works. You can also replace the keyboard if cleaning doesn't fix the issue.
3. Use the SFC and DISM Command Line Utilities
The System File Checker (SFC) tool scans your PC for corrupted system files and repairs them automatically. If your WinX menu isn't working because of missing system files, you can use this utility to fix the issue.
This Microsoft tool comes pre-installed with Windows, and you can run it from the Command Prompt.
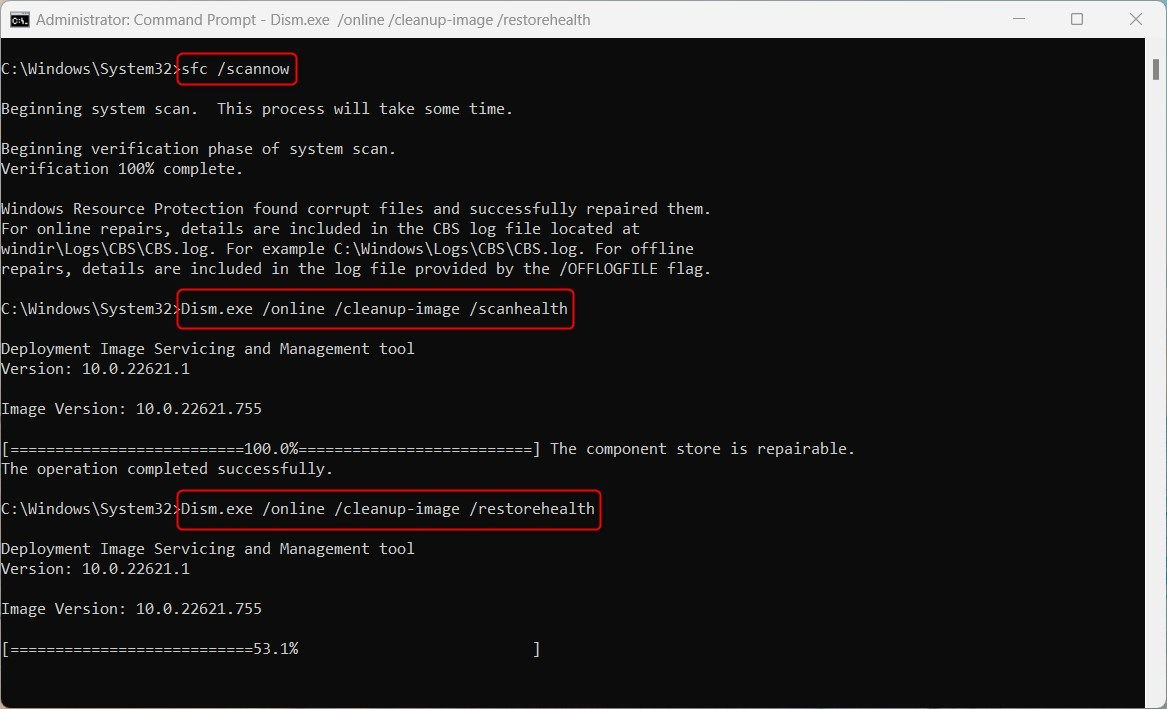
The DISM utility will take a few minutes to scan your system. Once it's done, reboot your computer and check if the Power User menu works normally.
If you're unsure as to how to use these handy commands, check out how to use the SFC and DISM tools to repair corrupted system files.
4. Check for Conflicting Programs
Sometimes third-party programs conflict with Windows functions, causing problems. To check for such programs, follow these steps:
- Press the Ctrl + Shift + Esc keys simultaneously. Doing this will launch Task Manager.
- Once inside the Task Manager, switch to the Startup apps tab and disable third-party programs installed on your computer. For that, right-click on a program and select Disable.
- After this, reboot your computer and see if it solves the issue.
If the Power User menu works after turning off startup apps, it confirms that one of these third-party programs is causing the issue. Now enable each program individually and check if it conflicts with your WinX menu. If it does, uninstall the program from your PC.
If disabling startup programs doesn't fix the issue, uninstall any recently installed programs. One of these programs may prevent the Power User menu from functioning correctly.
5. Remap the Shortcut Keys
This is another quick way to solve your WinX menu issue. You can remap the shortcut keys and assign them to other commands or functions.
To remap shortcut keys, you can use the Windows Registry Editor or keyboard mapping programs like SharpKeys and AutoHotkey. Both of these apps let you create custom key mappings quickly. If you aren't sure how to do that, read our guide on how to remap your keyboard layout on Windows.
6. Tweak the Registry Editor
Before you continue, create a Windows registry backup. This way, you can restore the registry to its original state if anything goes wrong.
Once done, you're now ready to edit the registry:
- Press Win + Q to launch the Windows search.
- Type regedit in the search bar and press Enter to launch the Registry Editor.
- If you're prompted for confirmation, select Yes to continue.
- Navigate to the following path in the Registry Editor:
HKEY_CLASSES_ROOT\piffile
- In the right pane of the registry, search for the IsShortcut key. If you find NoIsShortcut, right-click and rename it to "IsShortcut."
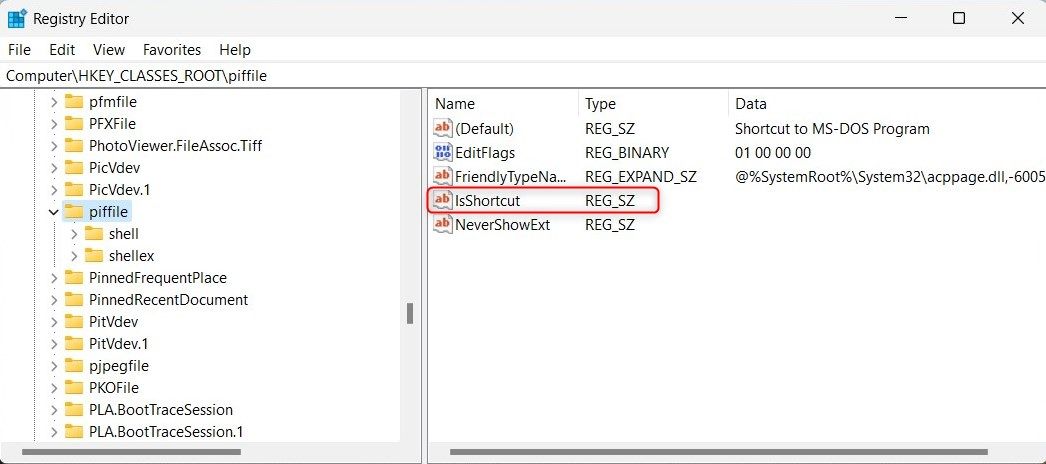
Close the Registry Editor and restart your computer. Now check if your WinX menu works correctly after rebooting your system.
7. Copy the WinX Folder From the Default User Profile
If the problem persists, you can copy the WinX folder from the default user profile and see if it solves the issue. Here's how to do it.
- Press Win + E to launch File Explorer and navigate to the following path:
C:\Users\Default\AppData\Local\Microsoft\Windows

- Copy the WinX folder and paste it to the same location, but this time in your user profile. In the below path, replace "YourUsername" with your Windows user account name:
C:\Users\YourUsername\AppData\Local\Microsoft\Windows
- If you're prompted for confirmation, select Yes to continue.
Now restart your computer and check if you can access the Power User menu. The Win + X shortcut keys should now work correctly.
Fixing the WinX Menu on Windows
Hopefully, one of these solutions has helped you fix the Win X menu problem on your Windows PC. If the issue persists, perform a system restore. This process will undo the recent changes made to your system and restore it to a previous working state.
If you don’t feel confident tinkering around with your system, it’s best to contact a computer technician and let them handle the issue for you.