Home → Apple → Printer Friendly Version
Apple
All things related to Apple products, MacBooks, iMacs, iPhones, iPads, and other devices and Apple software.
- 1. General
- 1.1. Uninstall Connect Control Client for Mac
- 1.2. How to download and install macOS
- 1.3. Create a bootable installer for macOS
- 1.4. How to Reset Your Admin Password on a Mac
- 1.5. Change your Mac startup disk
- 1.6. How to create a macOS Time Machine backup
- 1.7. How to Back Up Your Mac to NAS with Time Machine
1. General
1.1. Uninstall Connect Control Client for Mac
1.2. How to download and install macOS
How to download and install macOS
Download and install current or previous versions of the Mac operating system on compatible Mac computers.
To maintain your computer's security, stability, and compatibility, Apple recommends using the latest macOS that is compatible with your Mac. macOS updates and upgrades also include the latest features and built-in apps such as Safari and Apple Music.
Use Software Update
Software Update is the fastest and easiest way to get macOS updates and upgrades, and it can use less storage space to download and install them.
Software Update shows only software that is compatible with your Mac. If Software Update says that your Mac is up to date, then no new software is currently available for your Mac model.
How to update or upgrade macOS using Software Update
Use macOS Recovery
If you want to reinstall macOS, or installation from Software Update is unsuccessful, or your Mac doesn't start up all the way because it doesn't have a working operating system, you can start up from macOS Recovery, then reinstall macOS from there.
How to reinstall macOS from macOS Recovery
Use the App Store
To download macOS from the App Store, you must download from a Mac that is compatible with that macOS. If your Mac isn't compatible, the App Store dims the Get button, says that the macOS is not compatible with this device, or says that the requested version of macOS is not available.
-
Use these links to find macOS in the App Store. If these links don't work as expected, try again using Safari, which is in your Applications folder.
-
Click the Get button in the App Store to begin downloading. Software Update might open and ask you to download from there.
-
After downloading to your Applications folder, the installer opens automatically. Follow the onscreen installation instructions. Or quit without installing to leave the installer in your Applications folder for later use.
Use a web browser for older versions
Older macOS versions are available as disk images that you can download using your web browser. To get the installer from the disk image, you must use a Mac that is compatible with that macOS.
-
Use these links to download a macOS disk image (.dmg) file. If these links don't work as expected, try again using Safari, which is in your Applications folder.
-
By default, Safari downloads the disk image to your Downloads folder, which you can open from the Dock or by choosing Go > Downloads from the menu bar in the Finder. Double-click the .dmg file to open it and see the package (.pkg) file within.
-
Double-click the .pkg file, then follow the onscreen instructions to install the macOS installer into your Applications folder.
-
Open your Applications folder and double-click the macOS installer, named Install [Version Name]. Follow the onscreen installation instructions.
Use a bootable installer
A bootable installer can be useful if you want to install macOS on multiple computers without downloading the installer each time, or when you can't install using macOS Recovery or the other methods.
To download an installer suitable for creating a bootable installer, use the App Store or use a web browser to download from a compatible Mac. The Mac must also be using the latest version of macOS Sierra or later.
How to create a bootable installer for macOS
Learn more
Need more help?
Tell us more about what's happening, and we’ll suggest what you can do next.
Published Date:
1.3. Create a bootable installer for macOS
Create a bootable installer for macOS
You can use a USB flash drive or other secondary volume as a startup disk from which to install the Mac operating system. These steps are primarily for system administrators and other experienced users.
Do you need a bootable installer?
You don't need a bootable installer to upgrade macOS or reinstall macOS. However, a bootable installer can be useful when those or other macOS installation methods are unsuccessful, or when you want to install macOS on multiple computers without downloading the installer each time.
Creating a bootable installer is not the same as preparing an external storage device for use as a startup disk.
Download the full macOS installer
-
Get the full installer by downloading it via the App Store or your web browser using the download links and instructions in How to download and install macOS. Important:
-
You might need to download from a Mac that is compatible with the macOS you're downloading. If downloading an older macOS, you might also need to create the bootable installer on an older Mac that is compatible with it.
-
Download from a Mac that is using the latest version of OS X El Capitan, or any later version of macOS. Find out which macOS your Mac is using.
-
Enterprise administrators: Download from Apple, not a locally hosted update server.
-
-
Check the name of the installer after downloading it. It should be an app named Install [Version Name], such as Install macOS Sequoia. If it’s a disk image (.dmg) or package (.pkg) file, review the download instructions for details about how to get the installer from these files.
-
Check the location of the installer. It should be in the Applications folder, which is the folder that opens when you choose Go > Applications from the menu bar in the Finder. Move the installer to this folder, if necessary.
Connect and rename your USB flash drive
-
Connect a USB flash drive or other secondary volume directly to your Mac.
-
Check the storage capacity of the flash drive. A 32GB flash drive has more than enough storage space for any macOS installer, and 16GB is enough for most earlier versions of macOS. If more space is needed, Terminal will let you know. When you create the bootable installer, this flash drive will be erased.
-
Change the name of the flash drive to MyVolume, which is the name expected by the Terminal commands below.
Use Terminal to create the bootable installer
-
Open Terminal, which is in the Utilities folder of your Applications folder. Or use Spotlight
 in the menu bar to find and open it.
 -
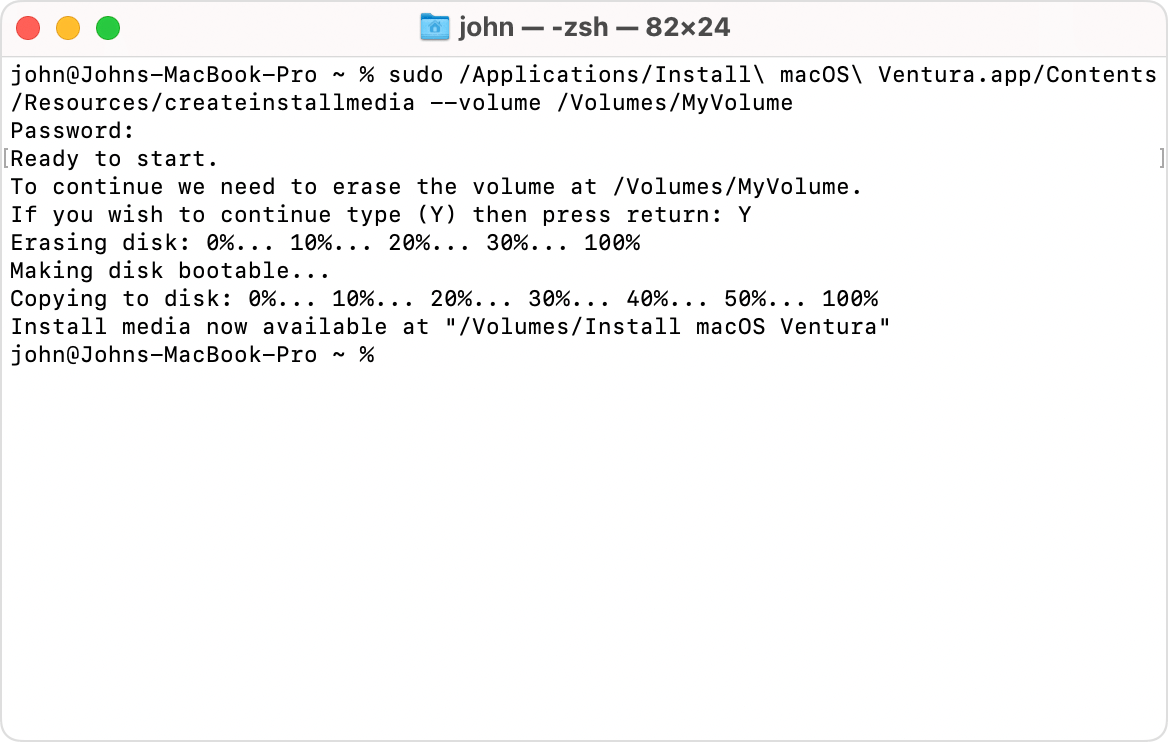
Depending on which macOS you downloaded, drag within the scrollable area of one of these commands to select the full command. Then copy it and paste it into Terminal. Press Return to enter the command.
-
Sequoia:
sudo /Applications/Install\ macOS\ Sequoia.app/Contents/Resources/createinstallmedia --volume /Volumes/MyVolume -
Sonoma:
sudo /Applications/Install\ macOS\ Sonoma.app/Contents/Resources/createinstallmedia --volume /Volumes/MyVolume -
Ventura:
sudo /Applications/Install\ macOS\ Ventura.app/Contents/Resources/createinstallmedia --volume /Volumes/MyVolume -
Monterey:
sudo /Applications/Install\ macOS\ Monterey.app/Contents/Resources/createinstallmedia --volume /Volumes/MyVolume -
Big Sur:
sudo /Applications/Install\ macOS\ Big\ Sur.app/Contents/Resources/createinstallmedia --volume /Volumes/MyVolume -
Catalina:
sudo /Applications/Install\ macOS\ Catalina.app/Contents/Resources/createinstallmedia --volume /Volumes/MyVolume -
Mojave:
sudo /Applications/Install\ macOS\ Mojave.app/Contents/Resources/createinstallmedia --volume /Volumes/MyVolume -
High Sierra:
sudo /Applications/Install\ macOS\ High\ Sierra.app/Contents/Resources/createinstallmedia --volume /Volumes/MyVolume -
El Capitan:
sudo /Applications/Install\ OS\ X\ El\ Capitan.app/Contents/Resources/createinstallmedia --volume /Volumes/MyVolume --applicationpath /Applications/Install\ OS\ X\ El\ Capitan.app
-
-
When prompted, type your administrator password and press Return. Terminal doesn't show any characters as you type.
-
If you get a message that the installer does not appear to be a valid installer application, delete the installer, use Disk Utility to repair your startup disk, then download the installer again.
-
If you get a message that the command was not found, make sure that you’re using the correct command and the installer is in your Applications folder and named Install [Version Name]. And if creating the bootable installer on a Mac that is using macOS Sierra 10.12.6 or earlier, append
--applicationpathto the command, followed by the appropriate installer path, similar to what is shown at the end of the command for El Capitan.
-
-
When prompted, type Y to confirm that you want to erase the volume, then press Return. Terminal shows the progress as the volume is erased.
-
If you get a message that Terminal would like to access files on a removable volume, click OK to allow Terminal to proceed.
-
If Terminal can't erase successfully, use Disk Utility to erase the volume using Mac OS Extended (Journaled) format, then try again.
-
-
When Terminal says that the install media is now available, your USB flash drive should have the same name as the installer, such as Install macOS Sequoia.
-
Quit Terminal, eject the flash drive, and disconnect it from your Mac.
This example shows the creation of a bootable installer for macOS Ventura:
Use the bootable installer
Follow the appropriate steps based on whether you’re using the bootable installer on a Mac with Apple silicon. Your Mac must be connected to the internet so that the installer can get firmware and other information specific to this Mac model. If the macOS you’re installing is incompatible with your Mac, installation might not complete or your Mac might start up to a circle with a line through it.
Mac with Apple silicon
-
Shut down or turn off your Mac.
-
Connect the bootable installer directly to your Mac.
-
Press and hold the power button on your Mac. As you continue to hold, your Mac starts up and loads startup options, which shows your bootable volumes, including the bootable installer.
-
Select the bootable installer, then click Continue.
-
When the macOS installer opens, follow the onscreen instructions.
Any other Mac
-
Shut down or turn off your Mac.
-
Connect the bootable installer directly to your Mac.
-
Turn on your Mac, then immediately press and hold the Option (Alt) key.
-
Release the Option key when you see a dark screen showing your bootable volumes, including the bootable installer.
-
Select the bootable installer, then click the onscreen arrow or press Return.
-
If you're using a Mac with the Apple T2 Security Chip and you can't start up from the bootable installer, make sure that Startup Security Utility is set to allow booting from external or removable media.
-
Choose your language, if prompted.
-
Select Install macOS (or Install OS X) from the Utilities window, then click Continue and follow the onscreen instructions.
Published Date:
1.4. How to Reset Your Admin Password on a Mac
How to Reset Admin Password on Mac
The easiest way to reset your admin password is to enter recovery mode. Here’s how to do that:
- Restart your Mac. You can only access the recovery mode while the laptop is booting up, which is why you need to restart it.
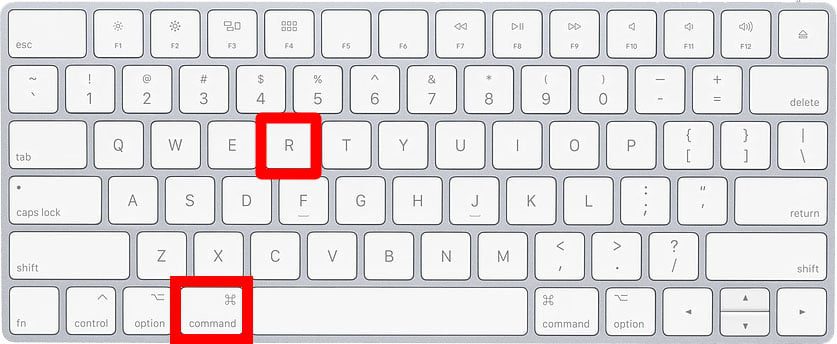
- While it is restarting, press and hold the Command + R keys until you see the Apple logo. If you see the login screen, you will have to restart and repeat this step again until you get to Recovery Mode.
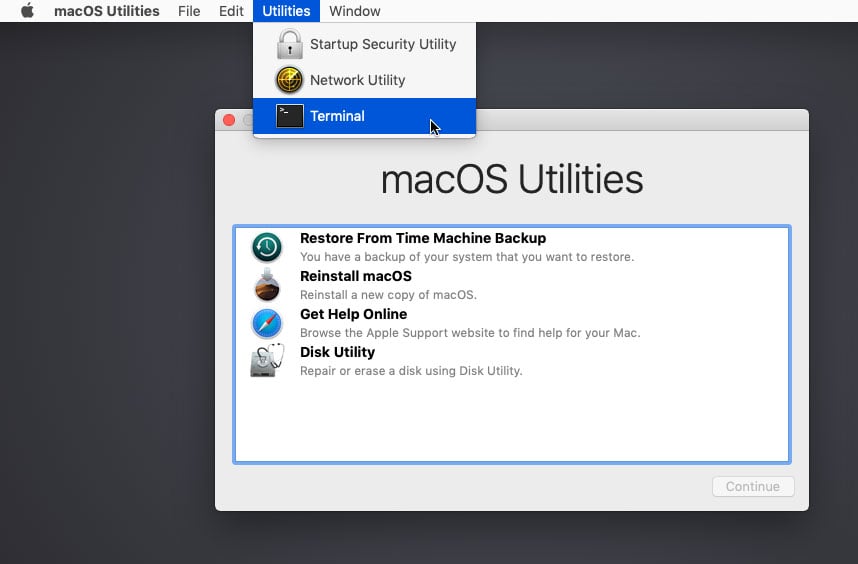
- Go to the Apple Menu at the top and click Utilities. This will open a drop-down menu.
- Then click Terminal.
- Type “resetpassword” in the terminal window. Don’t use any space in between the words.
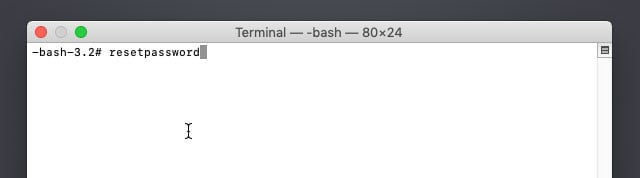
- Then hit Enter. This will open the Reset Password Assistant screen.
- Type your password and a hint.
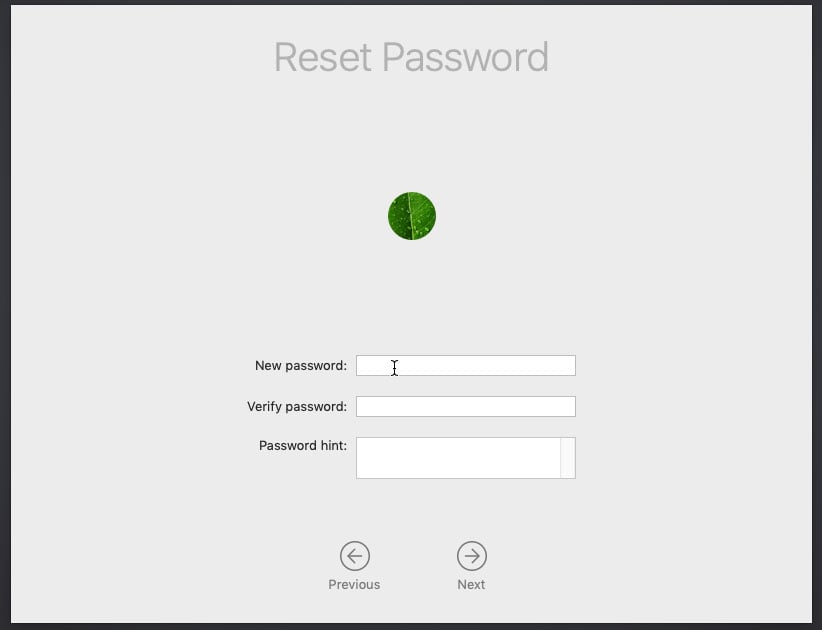
- Finally, click Restart. Once you get to the Login screen, select the admin user you just reset the password for and type your new password. Click Enter.
How to Reset your Password Using you Apple ID
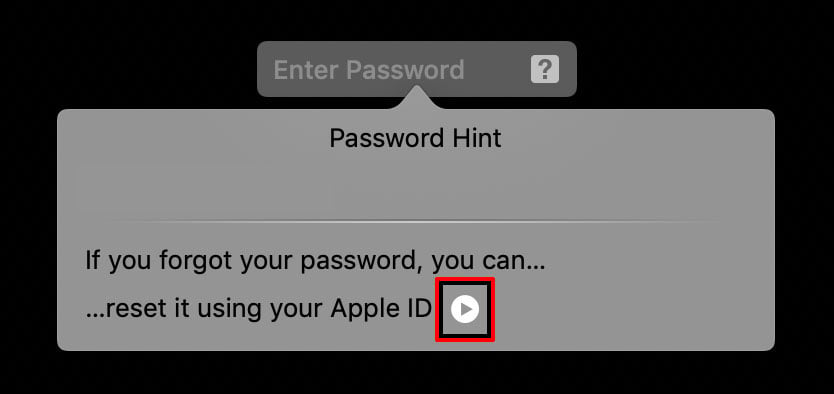
If you try to log in several times, you will see a pop-up message asking if you want to reset your password with your Apple ID. Follow these steps to continue:
- Click the arrow to use your Apple ID.
- Enter your Apple ID and password.
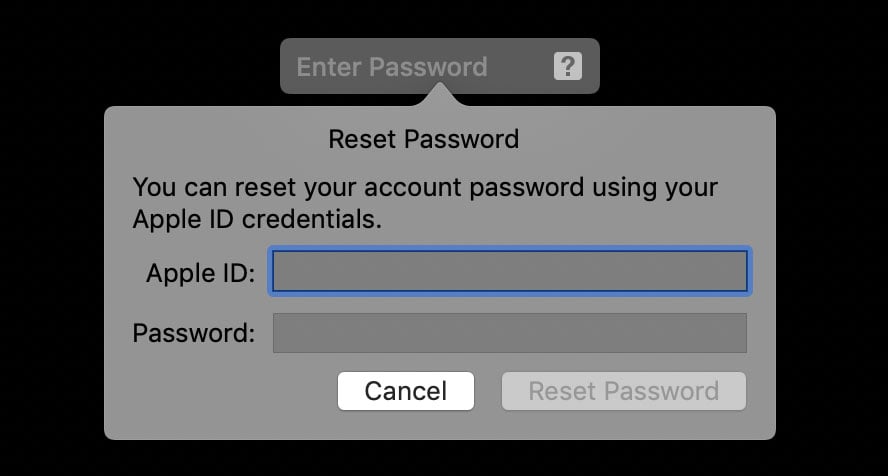
- Then hit Enter. Right after this, you will be asked to restart your computer.
- Click Restart to continue.
- Log in with your new password.
If you can get to your desktop, then you have successfully reset or changed your password.
How to Reset your Password Using Another Admin Account
If your Mac has more than one users, and you know the login credentials to another one of the accounts, you can use that account to log in and reset your password. Here’s how:
- Log in to another admin account.
- Go to System Preferences. You can find this in your Applications folder.
- Next, click Users & Group.
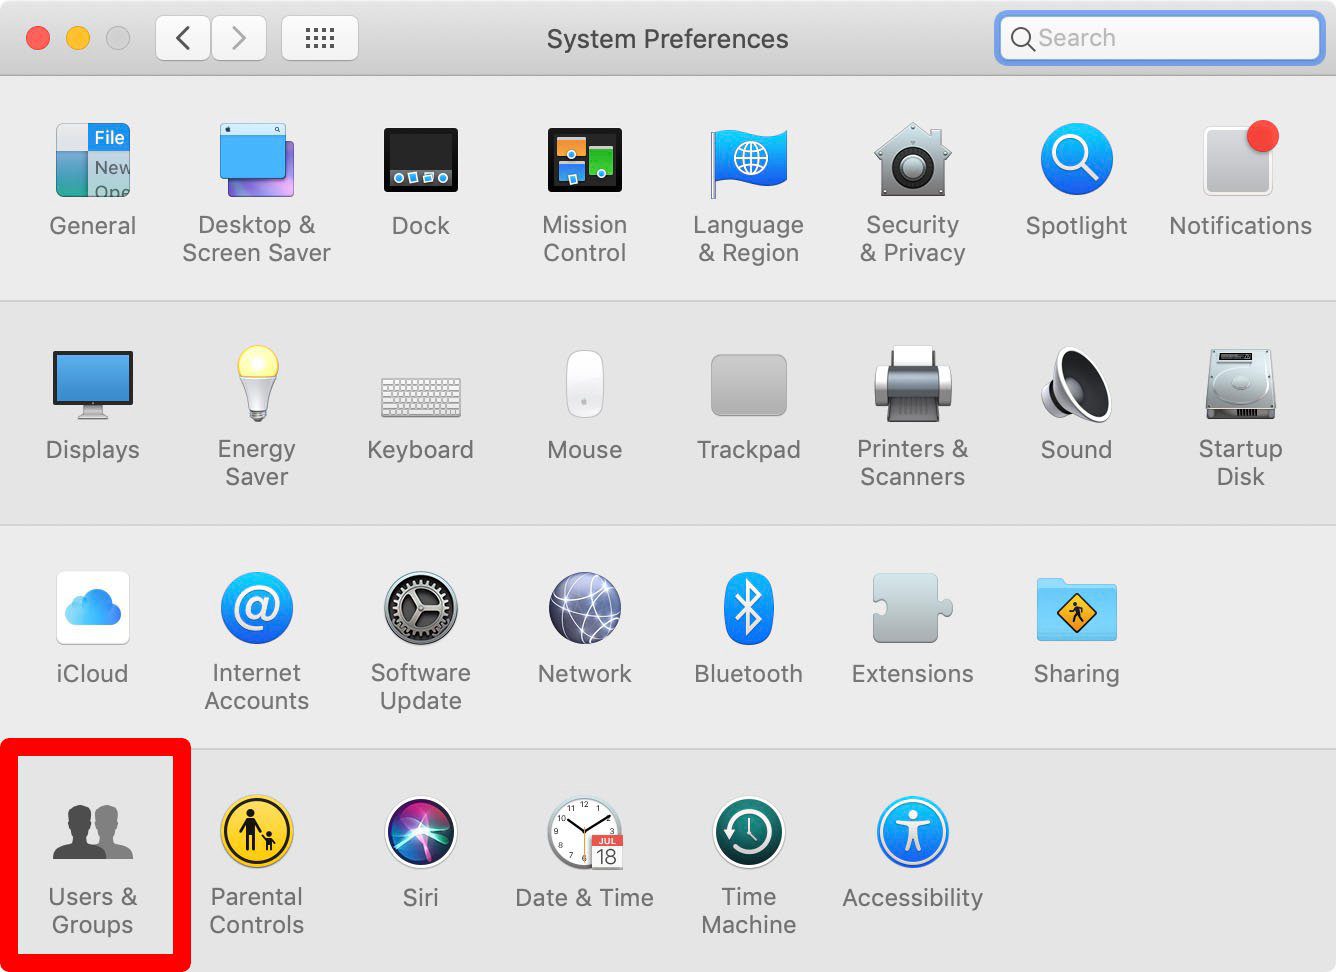
- Click on the padlock in the bottom-left corner of the window. You will have to enter the username and password of that user again.
- Select the user you want to reset the password for, then click Reset Password.
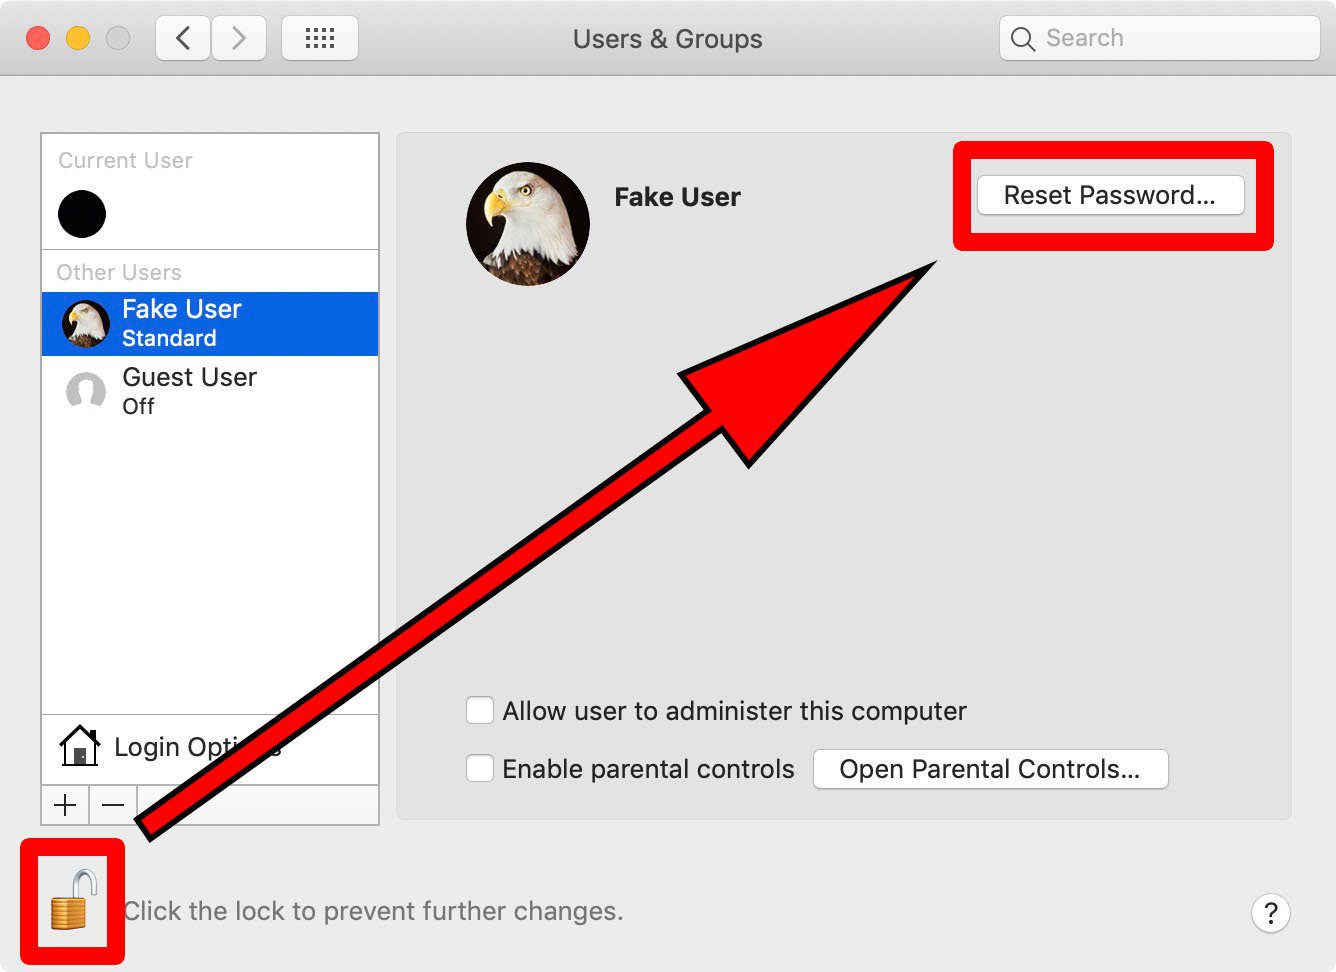
- Fill in the necessary fields and hit Enter.
- Then log out of the current user account. This will bring you to the Login screen.
- Log in to the account you just changed the password for.
1.5. Change your Mac startup disk
Change your Mac startup disk
You can start up your Mac from a network volume, a different disk, or another operating system. To do so, you need to change your startup disk.
Important: If you have a Mac with an Apple T2 Security Chip, added security features may need to be set in order to change the startup disk. See What is the Startup Security Utility? If you have a Mac with Apple silicon, see Change the security policy.
Change your startup disk once
-
Shut down your Mac, then do one of the following:
-
On a Mac with Apple silicon: Press and hold the power button until “Loading startup options” appears.
If you’re using a Mac mini, wait for the system indicator light to turn amber.
-
On other Mac computers: Press and hold the Option key as you press the power button to start up your Mac.
-
-
When you see the available startup disks, select one, then click the Continue button (on a Mac with Apple silicon) or
 (on other Mac computers).
The next time you restart your computer, it starts up from the disk you selected.
Set a default startup disk
-
On your Mac, choose Apple menu

 in the sidebar, then click Startup Disk on the right. (You may need to scroll down.)
 -
Click the icon of the disk you want to use, then click Restart.

WARNING: When selecting a network startup volume, make sure you select a network startup volume and not a network install image. Selecting a network install image reinstalls your system software and may erase the contents of your disk. A standard network volume icon appears as a globe with a folder. A network install icon appears as a globe with a downward-pointing green arrow.
1.6. How to create a macOS Time Machine backup

How to create a macOS Time Machine backup

30 minutes - 6 hours
Very easy
Introduction
Go to step 1Time Machine is data recovery tool built into macOS that is handy for backing up and restoring important files. This guide will show you how to enable Time Machine and save a backup of your Mac computer to another storage drive. To follow this guide, you will need an external storage drive—preferably one with more storage than the amount you are currently using on your internal drive.
Time Machine was first introduced with macOS 10.5 Leopard in 2007 and has been included in every version of the OS since. This guide will illustrate a backup using macOS 10.14 Mojave, but the process is similar across macOS versions.


-
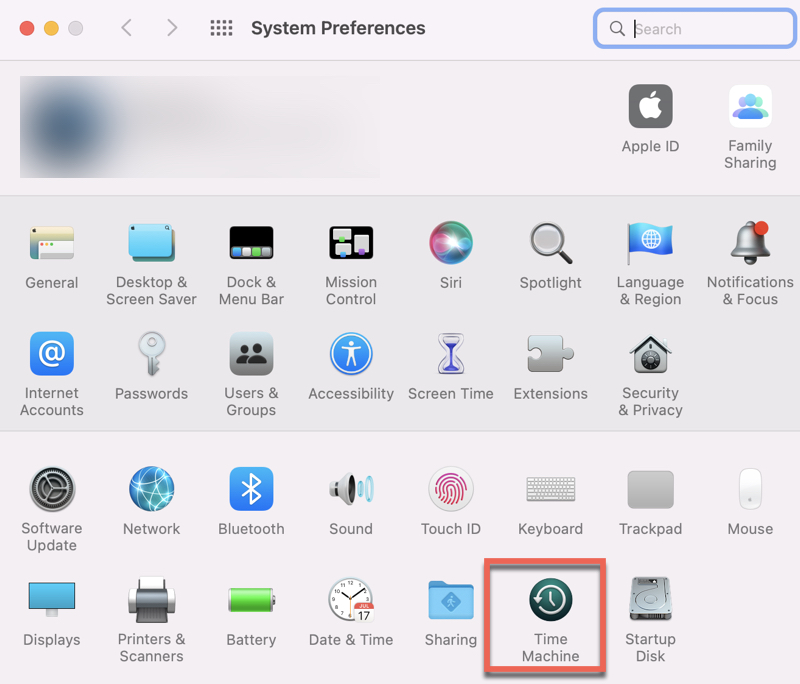
Open the Time Machine preferences menu, located toward the bottom of your System Preferences pane.


-
Before you select a backup disk, use the Options menu to exclude any folders you don't want in your backup.
-
Use the + and – buttons to add or remove folders from the exclusion list.
-
If your machine is a laptop, you can check the first box to allow the computer to back up while it is using battery power (not plugged in).
-
Check the second box if you want a notification whenever Time Machine automatically deletes a backup to save space.


-
If your external drive isn't already connected to your computer, connect it now.
-
Click the Select Backup Disk button and select your external drive.

-
If you want Time Machine to automatically make future backups, check the box on the left side of the settings pane labeled Back Up Automatically.
-
If you select Back Up Automatically, Time Machine will make backups once an hour, and keep backups as follows:
-
Hourly for 24 hours
-
Daily for the past month
-
Weekly for all previous months


To manually start a backup, first check the box labeled Show Time Machine in menu bar.
- Then click the new Time Machine icon in the menu bar, and select Back Up Now.


-
Before the backup begins, Time Machine will configure the drive you have selected (if necessary), and prepare the files on your main drive to be backed up.
- You may continue using your Mac while the backup is running. The backup will continue even if you close the Time Machine preferences window.
- The first backup could take a significant amount of time, depending on how much of your data you chose to exclude and the speed of your backup drive. Subsequent backups will be shorter.
-
When the backup is finished, a Backup Complete notification will appear on the upper-right side of the screen.
1.7. How to Back Up Your Mac to NAS with Time Machine
How to Back Up Your Mac to NAS with Time Machine
Summary: In this article, you will learn how to back up your Mac with Time Machine without an external hard drive. You will be able to save your Mac backups to a shared folder or disk easily by following this step-by-step guide. Meanwhile, iBoysoft DiskGeeker brings you an even easier way to back up your Mac and your data - disk clone.
For most Mac users, Time Machine on Mac is definitely the most convenient and simplest backup solution for automatically backing up the macOS system and your personal data, including apps, photos, files, and more. You can use an external hard drive, Airport Time Capsule, or a network drive for Time Machine backups.
This article will help you look at how to create a Time Machine backup to NAS with a stepwise guide. By following the steps carefully, you will be able to save the Time Machine backups to an online shared folder for restoring your Mac and data at some point.
A Time Machine Guide to Back Up and Restore Your Mac
This post will walk you through the steps to set up Mac Time Machine, create Time Machine backups, and restore Mac from Time Machine. Read more >>
Can you back up Mac to NAS
Absolutely, you can. Apple states that you can use Time Machine with an Airport Time Capsule by Apple, with a network-attached storage (NAS), or with an external storage device connected directly to your Mac through a USB or Thunderbolt port.
But not all network-attacked storage can store Time Machine backups. It requires your network server or NAS device to support Server Message Block (SMB) or Apple Filing Protocol (AFP).
In addition, some network disks made by non-Apple vendors do not support Time Machine. It is advised to contact your disk maker to see if it can be used for Time Machine backups.
How to back up your Mac to a NAS with Time Machine
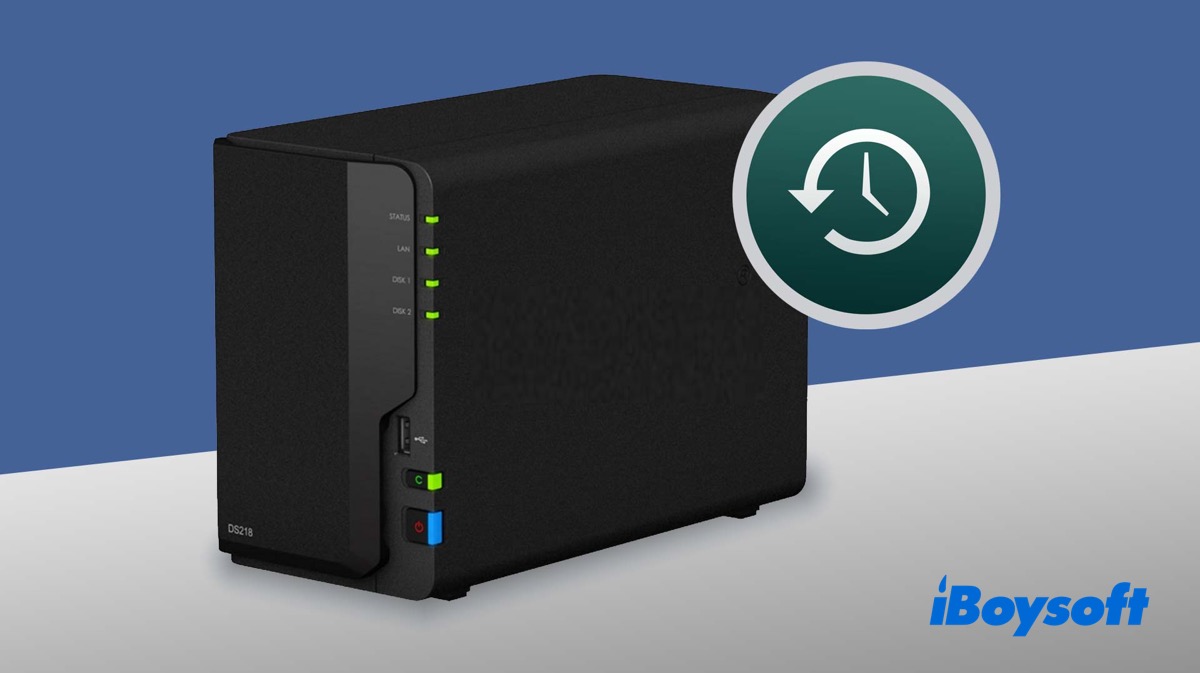
Tools like QNAP NAS or Synology NAS are network storage solutions that enable users to build a private and centralized cloud to store, access, back up, and share files.
Currently, Synology NAS is the most favored NAS provider, so this article will primarily talk about how to back up to a Synology NAS with Time Machine. The process probably will be similar for other NAS devices by other manufacturers and can be broken up into two main steps:
1. Configure the NAS for Time Machine backups
2. Set up the Time Machine on Mac to use the NAS
Note: this tutorial assumes that you have finished the initial Synology NAS setup, including the installation of the DSM on your Mac and the establishment of a storage pool.
Step 1: Configure the NAS settings for Time Machine backup
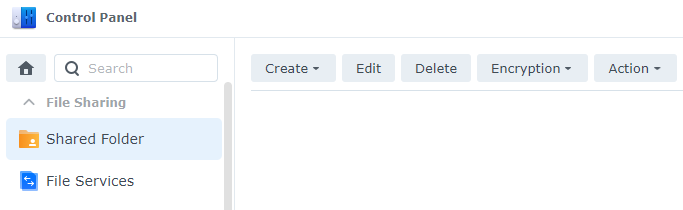
1. Go to Control Panel after signing in to DSM with an administrator account.
2. Select Shared Folder and click Create at the toolbar.
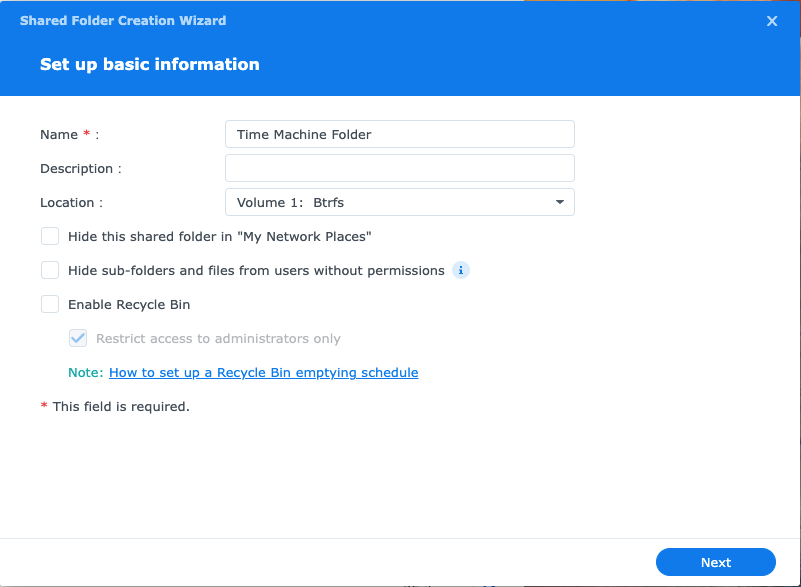
4. Click Next. It is NOT recommended to enable the Recycle Bin feature and use the encryption on the shared folder on the Synology NAS.
5. Continue to click Next or configure the settings in the following wizards including Advanced, Permissions, Advanced Permissions, and NFS Permissions until you arrive at the Confirm settings page.
6. Click Apply to complete creating a shared folder for Time Machine backup to NAS.
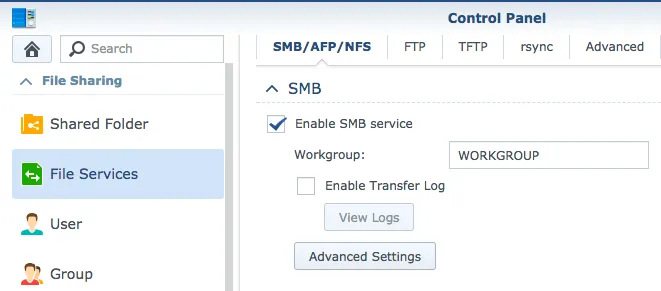
7. Stay in the Control Panel window and select File Services.
8. Go to the SMB tab and tick Enable SMB Service. For macOS Sierra (10.12) and later, Time Machine uses SMB as the default protocol.
9. Go to Advanced, and then Enable Bonjour Time Machine broadcast via SMB. In this way, if your network server or NAS device supports Time Machine Bonjour notifications, you can set up Time Machine backups even if you are not connected to the server.
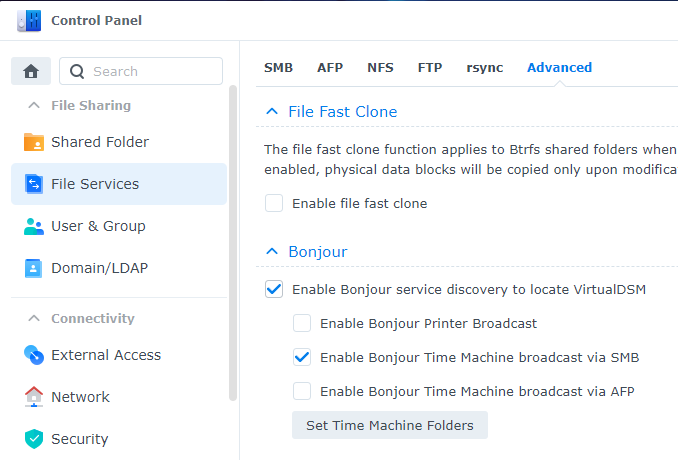
10. Click on Set Time Machine Folders.
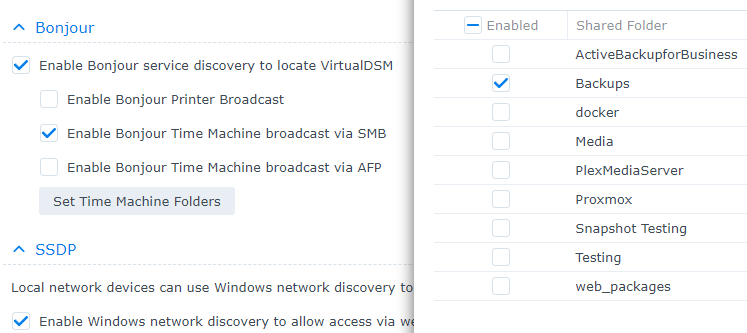
11. Check the folder where you want the Time Machine application to back up your Mac on your Synology NAS.
12. Click Save to save your settings and then you are done with setting the shared folder as Time Machine's backup target.
Step 2: Set up Time Machine backup to your NAS
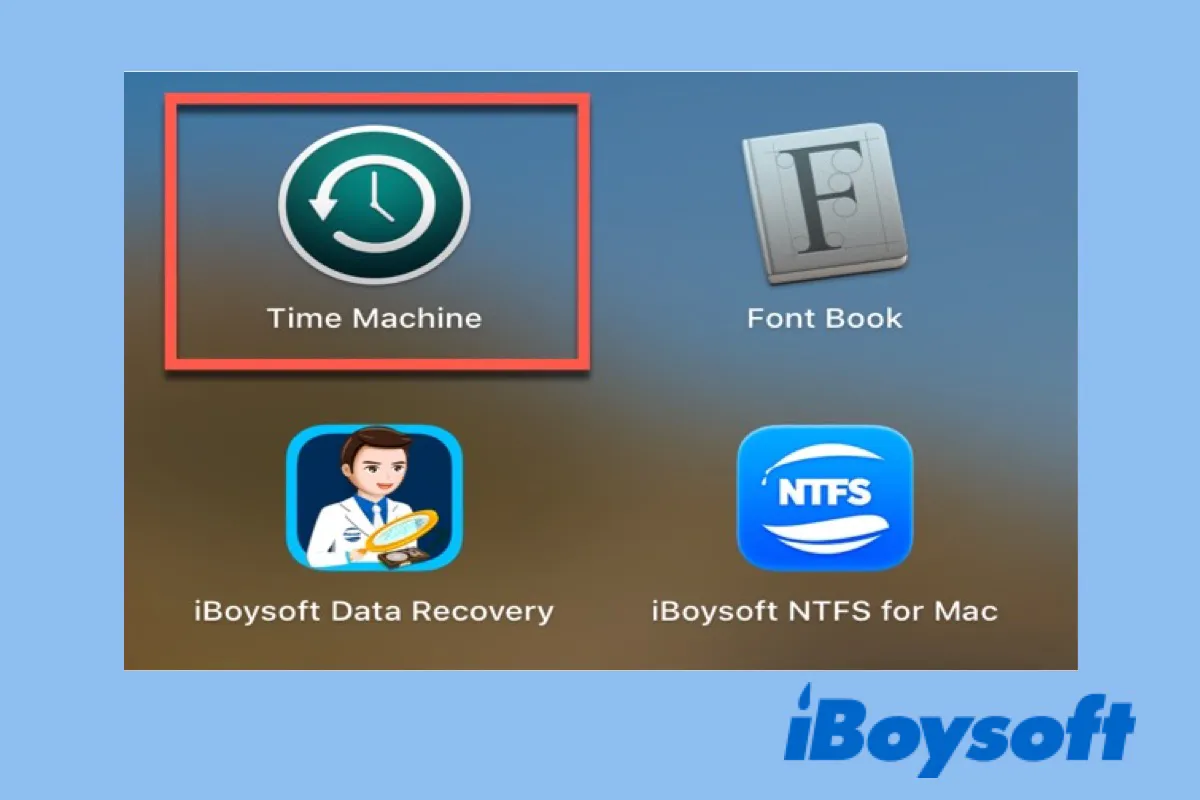
1. Open System Preferences from the Apple Menu and click Time Machine.
2. For easier access, tick the box Show Time Machine in Menu Bar; Select Back Up Automatically to let Time Machine is constantly backing up your Mac.
3. Click Select Backup Disk. 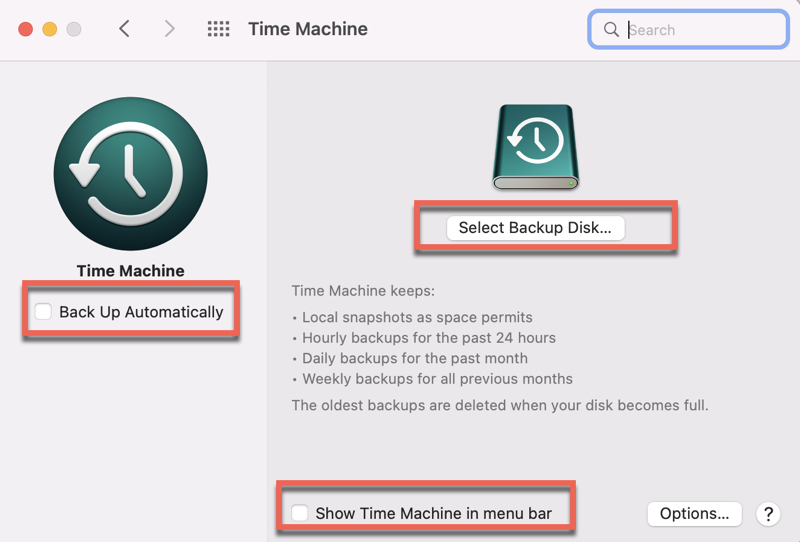
4. Choose the shared folder you created on the Synology NAS. For example, Time Machine on sever name of your Synology NAS.local. If you would like to encrypt your Time Machine backup to NAS, check Encrypt backups. This will slow down your backup when you are first time backing up your Mac to NAS.
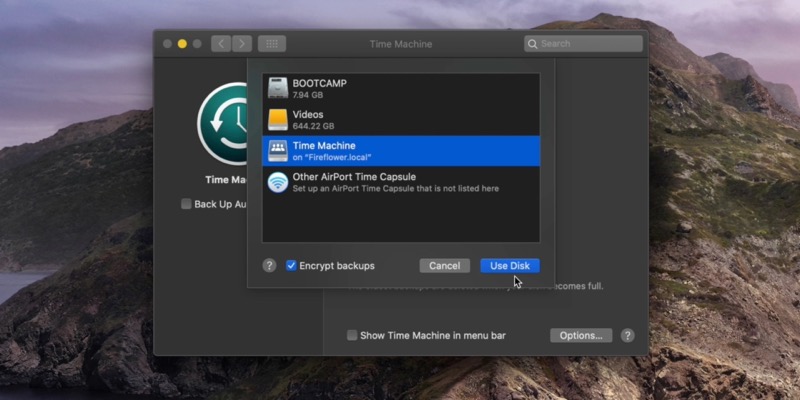
5. Click Use Disk.
6. Click Connect and then provide your username and password for the shared folder on DSM.
7. Click Connect and Time Machine will start backing up your system and your data shortly.
If Time Machine backup fails after upgrading to macOS Sequoia with your NAS, you're suggested to follow the steps again to re-establish the connection between the NAS and your Mac.
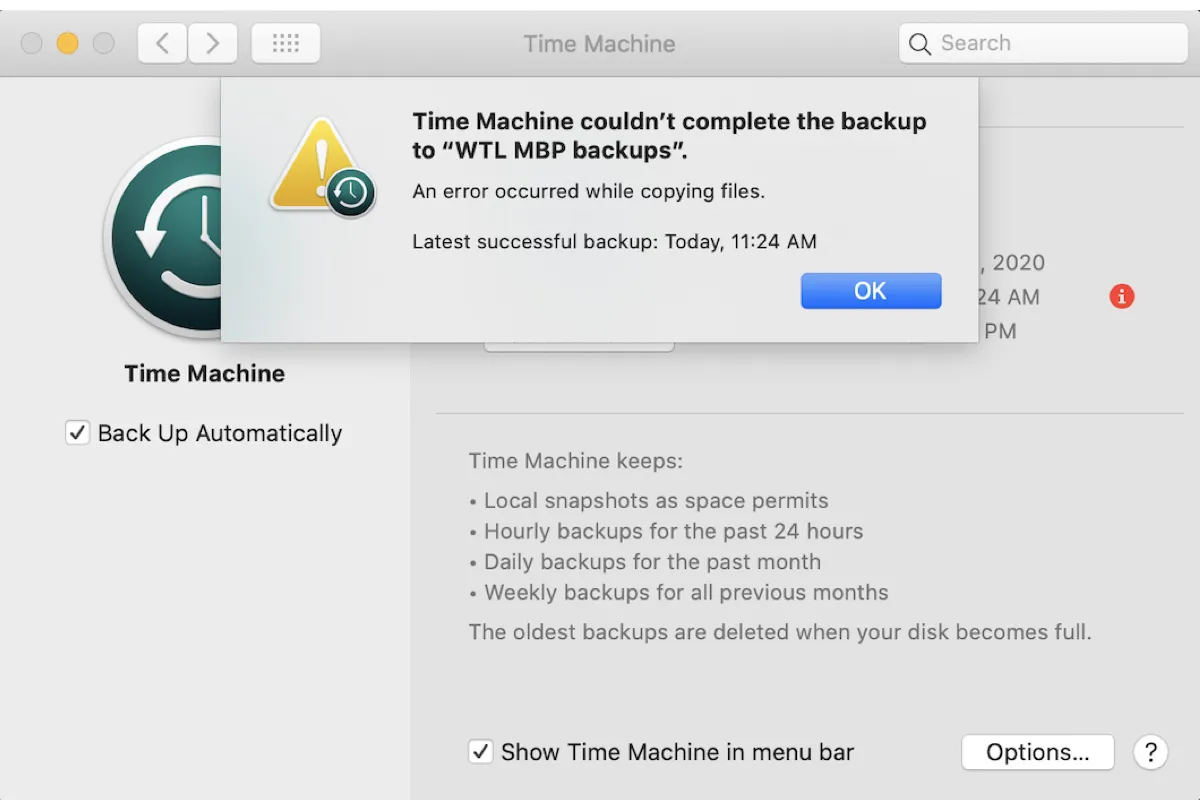
If you encounter the error that reads "Time Machine couldn't complete the backup," you can fix it with the solutions in this guide. It tackles the various causes of the error, such as insufficient space, and offers proven solutions.
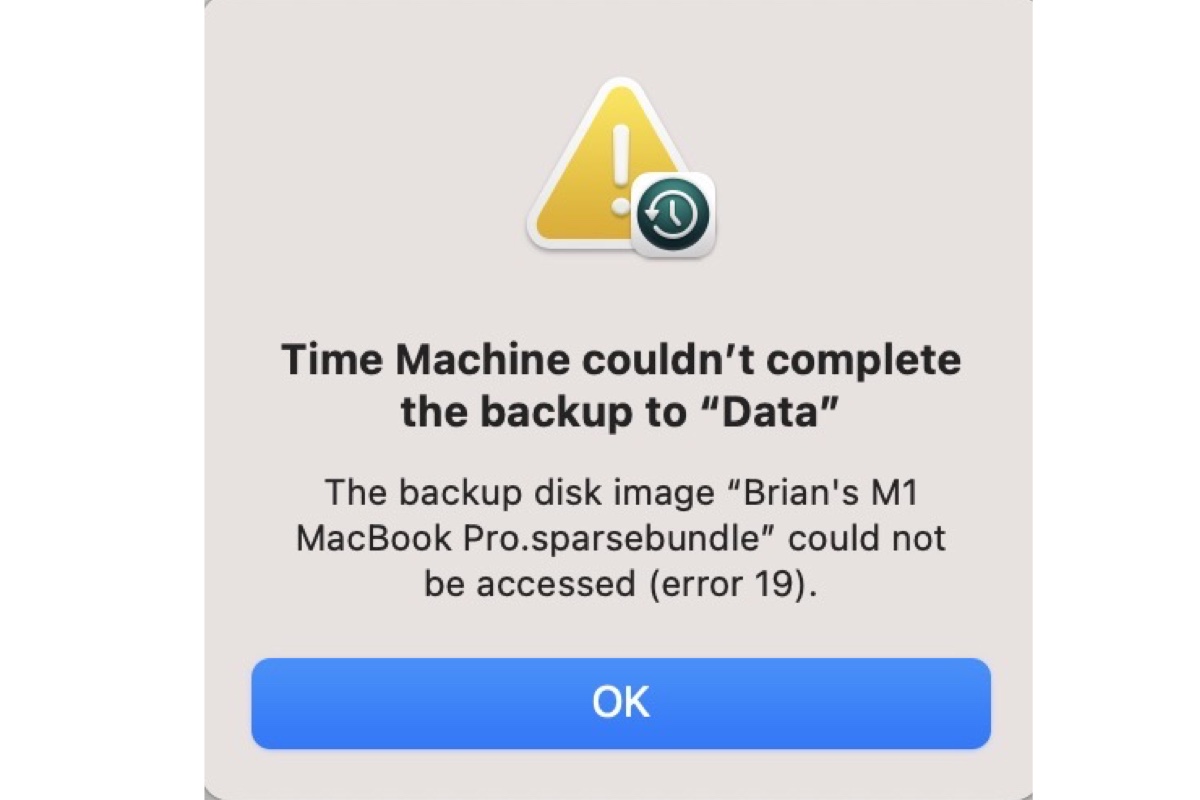
If you receive the error 16/19/112 with the message "The backup disk image could not be accessed" when initiating a Time Machine backup, keep reading this guide for solutions.
Step 3: Restore files with Time Machine backup to NAS (optional)
If you inadvertently deleted some files on your Mac and happened to empty the Trash can, you can use the Time Machine backup to NAS to restore your lost files easily.
Just like restoring files from backups on an external hard drive, you just need to connect to the NAS, open Time Machine software, and use the slider on the right side of your screen to navigate through your backed-up files. Then select the file or folder you want to get back and click Restore to restore it to the original location.
Alternative way: Clone your Mac hard drive with iBoysoft DiskGeeker
If you have an empty hard drive and don't want to use Time Machine on Mac for a continuous backup, it is recommended to clone the Macintosh HD for data backup completely. Disk clone is very helpful for intermittent backup as it doesn't require an all-time connection with your Mac computer.
iBoysoft DiskGeeker is an all-featured disk management toolkit for Mac users. The primary feature is to create a 1-to-1 copy of your startup disk to an external drive in case of data loss. It means everything on your Mac system drive including operating system files, apps, music, documents, videos, emails, archives, and many more.

Guide on How to Clone Mac Hard drive to External SSD
This article tells what Mac hard drive clone is and how to clone a hard drive on a Mac in 2 ways, including using Disk Utility and iBoysoft Mac disk clone tool. It also lists the steps on how to restore your Mac from a clone. Read more >>
How to back up your Mac by cloning your Mac hard drive:
1. Download and install iBoysoft DiskGeeker on your Mac.
2. Connect an empty external hard drive to your Mac and make sure the target disk has at least the same or larger capacity than Mac hard drive.
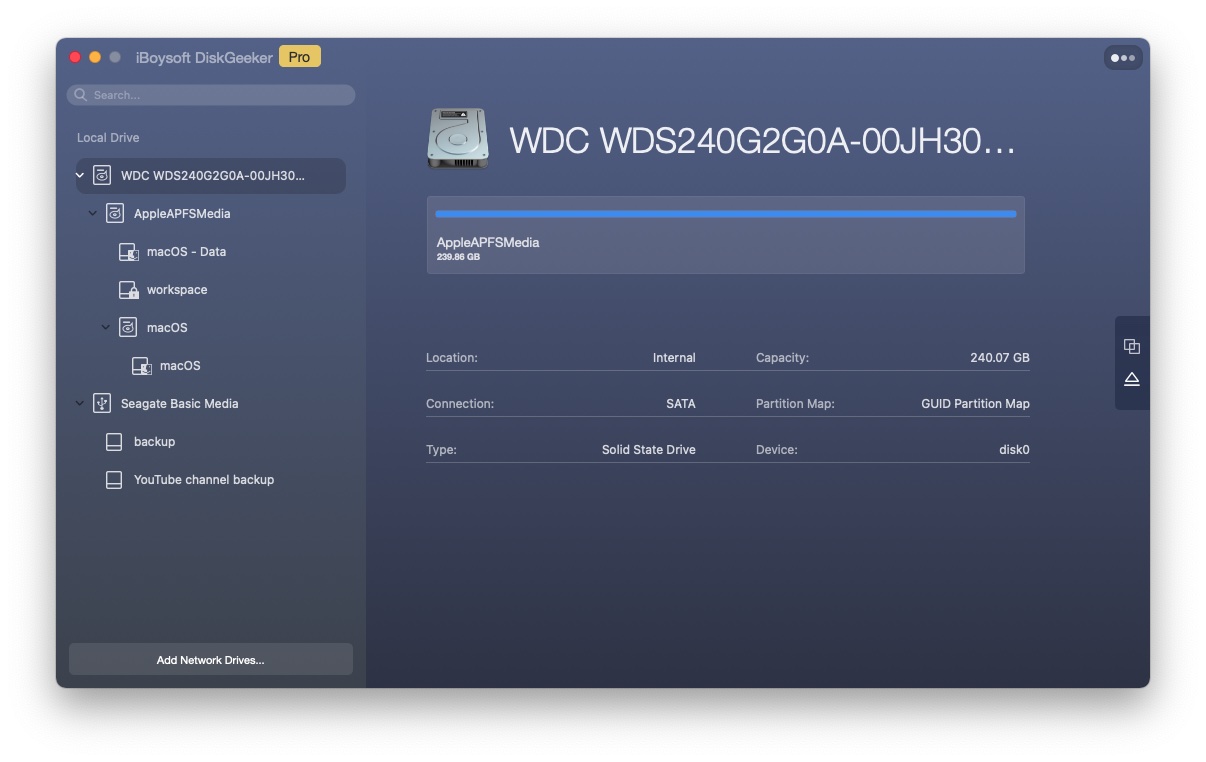
3. Launch the disk management tool by iBoysoft and select the SSD on your Mac.
4. Click Clone from the toolbar on the right side.
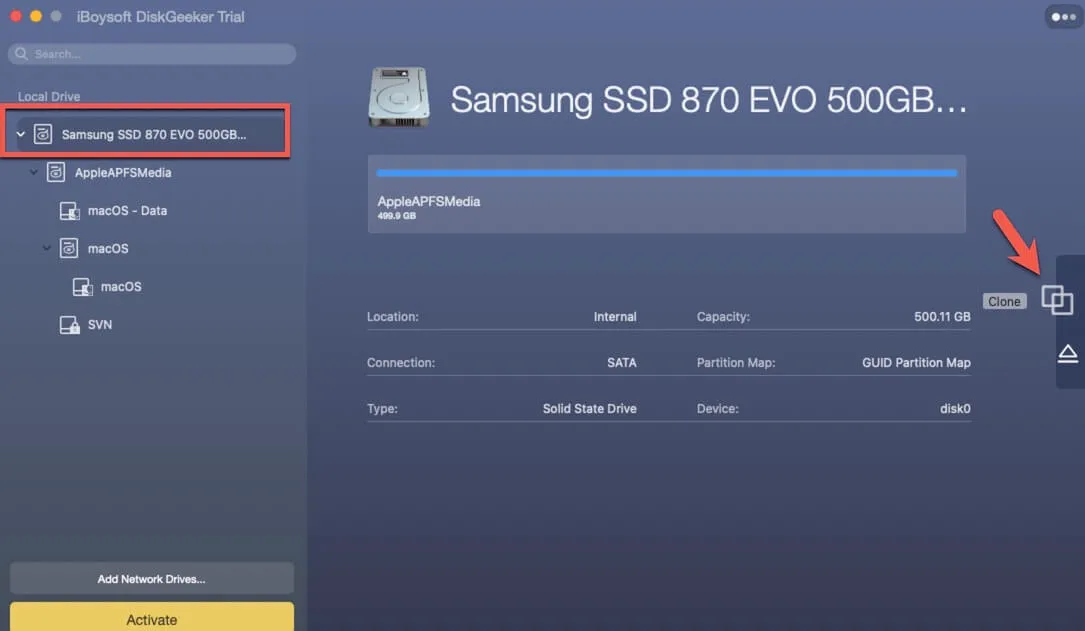
5. Choose the external hard drive in the pop-up and click Start Clone.
6. Wait until the clone completes and disconnect the external disk from your Mac.
Conclusion
This article explains how to back up your Mac without external hard drives. Apple allows you to create a Time Machine backup to NAS. The steps above seem to be complicated but actually are not. As long as you follow them carefully, backing up your Mac to a network drive is a very easy task.
If you feel overwhelmed by the process, try to use iBoysoft DiskGeeker to clone your Mac drive for backup.